Please visit my new, improved website!

>> Wildermuth Creative Portraits <<

  • In Anticipation of Christmas

    December
    8
    2009

    cross ornament photography by Leanne Wildermuth

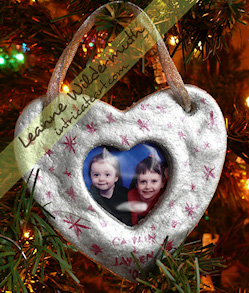
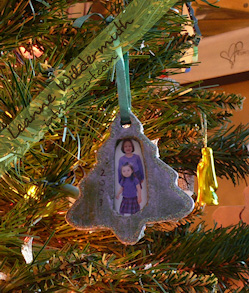
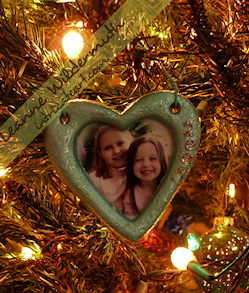
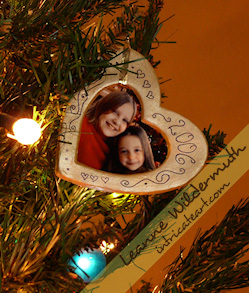
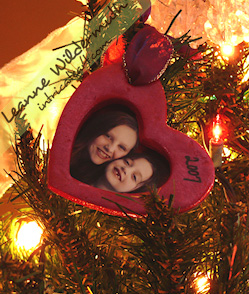
    Welcome to my Christmas Tree, where symbols of Christ can be found tucked away fondly in the best nooks and crannies of our Douglas Fir.

    We began collecting crosses a few years ago. Each year, we will choose a cross ornament to add to our collection – and over the years we anticipate that our tree will be filled with handmade ornaments, special ornaments from friends, and most importantly, Christ. Christmas is, after all, the celebration of His birth.

    Over the next couple of weeks, I’ll be sharing more ornaments from our tree, both new and old – captured with my (absolutely fantastic) new camera (that makes me seem magical, though truly, I am just a regular girl).

    I will also be making our annual dough ornaments – how they turn out each year is always a sweet surprise!

    I’d love for you to tell me about your tree – do you have special ornaments? Upload them to flickr (or somewhere) and share the link here! I’d love to see them!

    Some Words from Your Sponsor

    August
    21
    2009

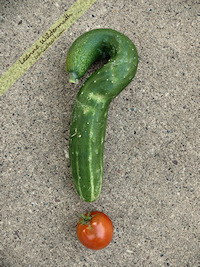
    Question mark cucumber Well, hello there!

    It’s been quite some time since I’ve updated my blog with a “regular”, non-giving-something-away, real honest to goodness words from my own mouth kind’a post. So here it is!

    This summer has flown right by. Once I put my garden in the ground, things picked up. I’ve signed back on with EWebscapes as a freelance designer so I’ve got a few projects going on there, a few on my own – and then toss in a weekly giveaway, children at home and bored, a husband who is on active duty with guys overseas, a complete gutting & revamping of my studio space, a couple of road trips, tons and tons of PICKLES, planting an insane amount of daylilies at our Church and OH YEAH, I can’t forget about Facebook!!

    And that about sums it up.

    You’d think that with all of this, I’d have lost a few pounds this summer right? Wrong. Add that to my pile of “things that frustrate me to no end.” I wait, for school to start – and I hope that things become “normal” again. What, pray tell, is normal to me?? Will I even recognize it? I wonder.

    Today, I decided to stop for a few minutes. To give you a glimmer of hope that some day, I will write again, I will write more often. As my time over the summer is so short, I am finding that the little space that Facebook provides for status updates is just enough to keep my creative spark alive, and it makes me anticipate the time I will be able to sit down and craft a fun and creative story to share.

    My weekly custom portrait giveaways are also giving me exactly what I need each week to stay creative as well. It is not a large investment of time, and I still feel very committed to it – 34 weeks in and I still enjoy it, giving that piece of time to someone each week is extremely fulfilling to me, and so I shall push on through the end of the year!

    I can’t tell you how much I appreciate your support through the years and especially during “dry” spells, where stories are sparse and my weekly drawing is your only eye candy until the next week. I cherish your comments and e-mails and, well, thank you. So much. Because I know you’re busy too, and that you understand but don’t forget. I love you for that.

    On with the day now – and don’t forget, it IS Friday, and this week’s custom portrait giveaway will close at around 5pm tonight!

    p.s. Like my veggies? They are so sarcastic this year.

    White Irises, She said.

    May
    12
    2009

    White iris flower photo desktop wallpaper by Leanne WildermuthOn Mother’s Day, I offered my readers a free desktop wallpaper that I’d created from a photograph I took in my studio of a beautiful White Iris. (You can still download the 1024×768 if you haven’t already.)

    Pete (of Shakey Pete) commented and said that his mother raised Iris, so my wallpaper triggered a fond memory of his mom, appropriate on Mother’s Day, I think. His comment made me think. I love comments like that, so thanks, Pete. You brought my daughter and I a little closer on Mother’s Day. I appreciate that.

    There’s a story behind this White Iris, which I’ll get to here in a second, but Pete’s comment left me curious. What kind of flowers would my own children grow after I’m gone that will remind them of me, and why? I thought for sure that Catybug would say “Gerbera Daisies!” or even “Stargazer Lilies!” But no. That was not the case.

    Now let me tell you a little story.

    Last Wednesday, my children attended youth group – at two different churches. Catybug went with her girlfriend after school to attend youth at her church, and I dropped off my little Chickeymonkey at our church.

    On the way home, I had to run an errand to pick up food for our guinea pig and bunny. I find the best food for them at Teske’s, our local pet and garden center. I also really, really enjoy visiting the parrots! So, as you could probably guess, I visited the parrots first.

    Right. Why carry around loads of food if you just have to put it down to play with the critters? Common sense.

    Without any regard to how much time had passed (Because apparently, I have an eternity to shop while I’m at a pet store. Time stands still while you’re making cooey and clicky noises to birds, don’tchyaknow.), I visited with the animals. Then there was an uncomfortable moment where I was forced to either pet the Eclectus or buy him, so I ran and hid in the corner of the store and sucked the thumb he nearly bit off.

    I digress.

    I picked up 10 pounds of food for the critters that DON’T bite me, and ohhhh my gosh – —- a new truckload of flowers? Did someone say they got more flowers? Ooooh I had to check out the garden center.

    Now, rewind to earlier in the day. I’m talking to my dear, sweet friend Taba, and she’s telling me how she’s swooning over White Irises, and she really wants some. We’re talking about flowers, and I remind her of my Monkey Butt (aka Baboon Bottom) Batik Iris that I’ll actually get to see this year, and blabbity blab blab green thumb girl talk.

    Okay, got all that? She wants the White Iris. She wants ALL Irises, really, all of them. All in her yard. Right now. Yea, yea, so do I.

    Fast forward to me in the garden center, carrying around 10 pounds of smashed condensed timothy hay and corn flake chips. And then, then I spotted the Irises. The WHITE Irises.

    I chose the one that was on the verge of blooming. I thought, I’m going to name her Taba (which I did) and next year, I’ll split it and send her some for her garden! Irises, for those unfamiliar, have a bulk of the root at ground level, so one big giant stem teeter tottered above the root in a 4″ square pot. They had braced it up with little green stakes, so I carefully pulled it out from behind a half dozen other random colored Irises, and with one hand wrapped around 10 pounds of critter food, I carefully balanced a teeter-tottering White Iris in my right hand.

    And continued on in my search for anything else I might want to add to my garden.

    20 minutes later, I found more stuff. Crud, I found more stuff. I’m looking around for a cart, for anything I can put stuff down on – but found nothing. My left bicep was beginning to throb from the weight of the critter food and obviously, if I wasn’t careful with my right hand, my Iris would topple.

    I gently set it down, set the critter food down, and went on a search for a tray to put all of my finds in.

    Of course, the critter food and the new (mexican heather) went into the tray, but the Iris, the Iris was special. I held everything else in my left hand, and the Iris in the right.

    Careful…. carreeeeful….. I asked the checkout clerk if he had a tall brown bag to put the iris in, so it wouldn’t break. Together, we slid it down to the bottom of the bag. Aaaah. Safe. Wait – no – he didn’t know what color the pot was, so we had to reach down in there and pull it back out. Crap. We got it out – put it back in. Phew. Okay. Safe again.

    I paid for everything and loaded everything carefully into the back seat of the car. I put the Iris against the back seat, and braced it in with the critter food.

    Are you getting all of this carefulness? I could not and probably wasn’t EVER this careful with my own kids as newborns. But this Iris? I could. not. break.

    On the drive home, I called Taba. I was so excited to share my fortune! WoohOOOO and I’m going to split it and mail it to you and wheee! We’ll have the same White Irises! YAYYYY what are friends for!! Splitting perennials, that’s what!

    She asks what the official name of the Iris is, and I’m just about in my driveway, so I pull into my driveway, park in the garage, get out of the car, open the back door, grab ahold of the Very Special SUPER CAREFULLY HANDLED White Iris and pull it out of my car…..

    And busted the stalk.

    Yep. I did.

    So, when my eldest daughter returned from youth group, I told her this story. She laughed, and laughed, and laughed s’more. She even cried. She almost spit her ice cream out her nose.

    It makes sense to me, then, when I asked her what flower she’d plant to remember me by, she replied “White Irises.”

    Glad to know I’ll be giving that girl chuckles from beyond the grave!

    How To Make Photo Dough Ornaments

    December
    23
    2008

    dough ornaments how to recipe by Leanne Wildermuth
    Every year (since 2001), I’ve made these beautiful dough ornaments for our Christmas tree. This year I want to share with you my whole process, in case you’d like a crafty project or gift idea. It really is an any occasion craft, you can use different shapes, cutouts, themes and decorations to make it suit whatever you have going on. It’s a wonderful and sweet handmade gift!

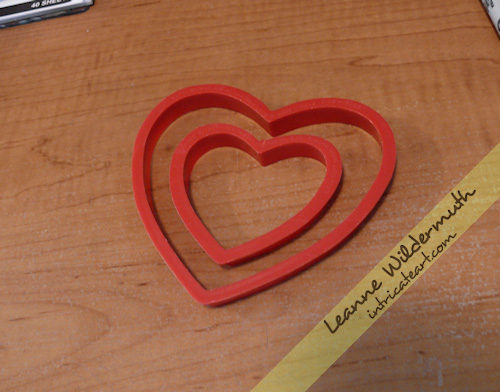
    The first part of the project (which I failed to take photos of) involves the dough ornament itself. First, you’ll need to pick out your shape. I have nested heart cookie cutters, so I chose the biggest one, and the second to smallest so that I have enough room for the girls photo. (I take the girls Christmas photos myself in my studio the day before.) Here’s my ornament shape:

    heart shaped cookie cutter
    The next task is making the dough – which is super easy. In a large bowl, combine 2 cups flour, 1 cup salt – and then add in 1 cup of water as you’re kneading the dough. This will make enough dough for about 10 of my ornaments, but I double the batch so the girls can make their own ornaments each year, too. Knead the dough really well, so it’s pliable and easy to manage.

    Whatever surface you’re working on, you want to be able to get your dough up easily. Use a flexible cutting board, or wax paper to lift it off the table and peel back away from the back of the ornament. Put a little flour out on the surface and roll your dough to about 1/4″ thickness. If it’s cracking, you can dust some flour on it and then spray with a mist of water from a spray bottle, smoothing over with your hand.

    Create your shapes using your cutter, and transfer them to an ungreased cookie sheet. To make holes for ribbons or hanging wire, just pop a hole into the shape using a straw, not too close to the edge so the dough doesn’t crack or break over time.

    Before you bake them, use a toothpick to go around the edges and clean off any jagged dough edges. Once these dry, they take a bit of work to file off – so do as much beforehand as you can.

    Bake your ornaments at 200 degrees for 2 hours. When they’re done, let them cool to the touch. Then, if you need to, use a nail file/buffer to clean off any jagged pieces from around the edges.

    Now, you can prep your creative surface for painting! I use aluminum foil or wax paper to make it easy to move them around as they’re drying.

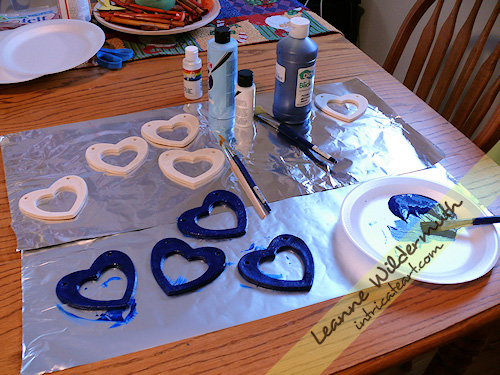
    dough ornaments how to recipe by Leanne Wildermuth
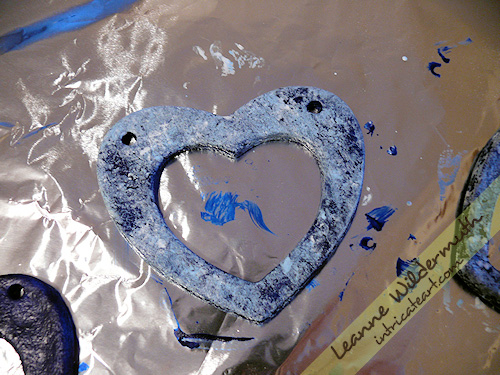
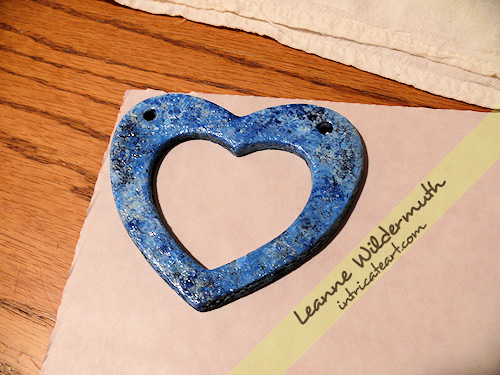
    I’ve got my base color, dark blue, on a few of my ornaments already. The design is different each year, and usually I know how I’m going to paint them and have all of my materials/paints/backing/wire purchased before I start my project. Since my photo backdrop is a mottled blue, I decided to follow it through to the ornament. It’s also flecked with red, so I chose a red self-adhesive felt backing paper and red decorative wire.

    dough ornaments how to recipe by Leanne Wildermuth
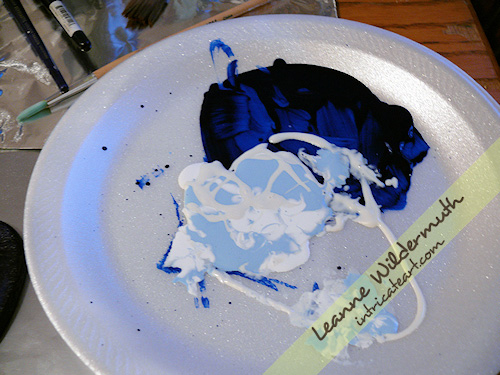
    Here’s my palette. I’ve got the dark blue drying, and I’m going to “sponge” on a light blue, white and pearly glaze. These are all acrylic paints you can pick up at Hobby Lobby for a couple of bucks. You really don’t need much, the small bottles are perfect. I put the paint on top of the other in a crazy pattern so it transfers to the ornament randomly. I paint through the holes and around to the back a little bit, just in case any edging shows through.

    Prepare to get messy! I just wadded up a paper towel for this part, just dab it onto the plate and then onto the ornaments.

    dough ornaments how to recipe by Leanne Wildermuth
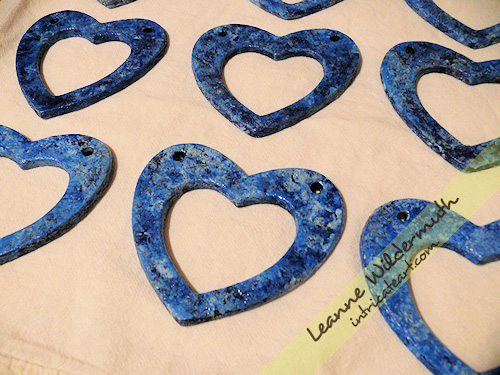
    Here’s how they look after the first coat. It’s a bit too light, so I let it dry (acrylic takes a minute or two to dry) and add another coat of the dark blue over the top.

    dough ornaments how to recipe by Leanne Wildermuth
    Once I finished blotting them and allowed the paint to dry, I went over the ornaments with a coat of Mod Podge to give it a really glossy lustre. This seals the dough and helps it last longer, too!

    dough ornaments how to recipe by Leanne Wildermuth
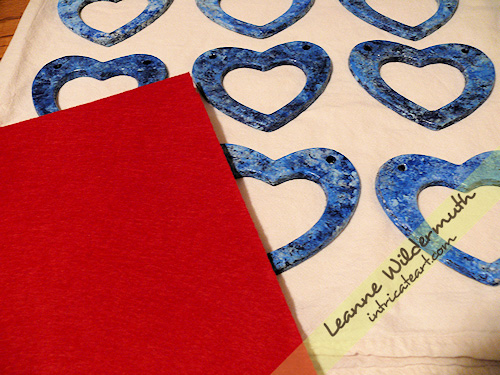
    Next, I get the self-adhesive felt out. (I found mine at Hobby Lobby in the crafting area with all the felting tools.) I wish I had found this stuff years ago!! It made the whole process wonderful and opens up a variety of ways that these ornaments can be made and used.

    dough ornaments how to recipe by Leanne Wildermuth
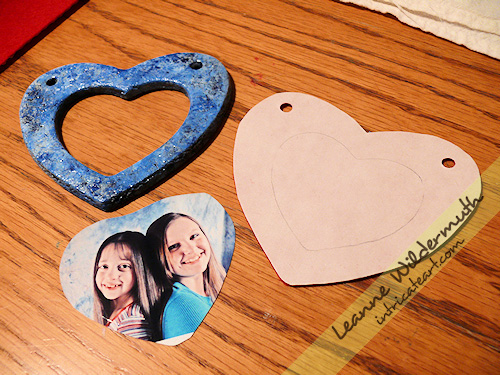
    Flip the felt over, and trace the outside of your ornament and mark the holes. Just do one at a time, because they do tend to all come out different based on how they cook, if they’re slightly misshapen in the transfer to the cookie sheet, etc.

    dough ornaments how to recipe by Leanne Wildermuth
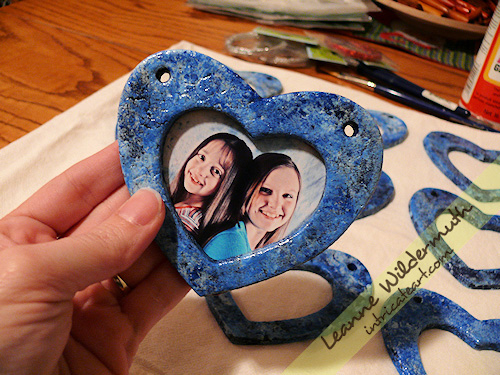
    I’ve printed the girls photos and sized them so that they’ll fit perfectly inside my little “window”. I set the photo under the opening and trace the opening onto the photo, then cut around it giving about 1/4″ overlap.

    dough ornaments how to recipe by Leanne Wildermuth
    I cut out the felt, used a hole-puncher for the holes, and have everything ready to assemble the ornament.

    dough ornaments how to recipe by Leanne Wildermuth
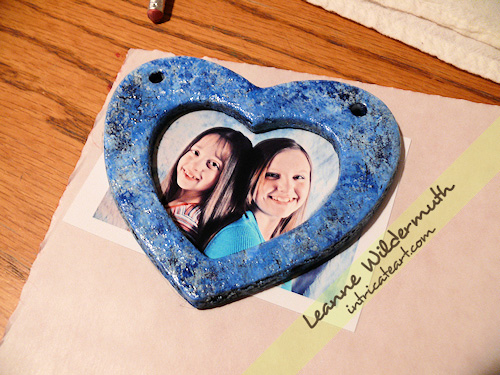
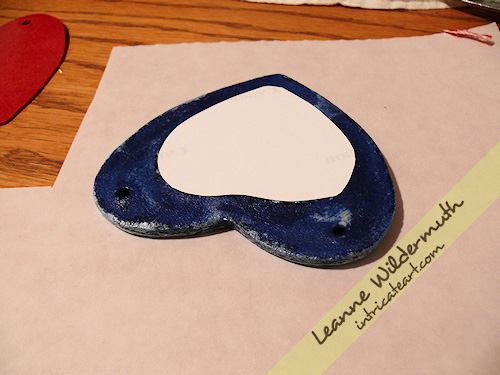
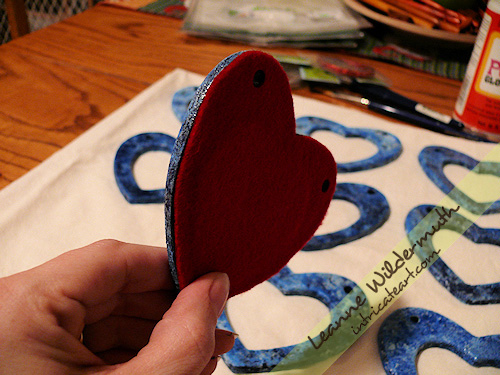
    Flip the ornament over, and align the photo to the backside, lifting to make sure it’s in position. Then just peel and stick your felt to the back, carefully lining it up to get it into position before pressing it down firmly onto the ornament.

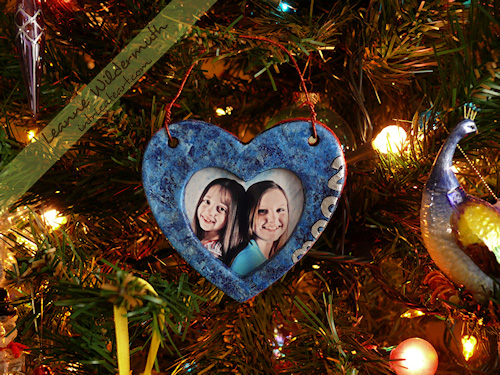
    photo dough ornament by Leanne Wildermuth
    Here’s the front side of the ornament.

    photo dough ornaments by Leanne Wildermuth

    Here’s the backside, felted.

    photo dough ornaments by Leanne Wildermuth

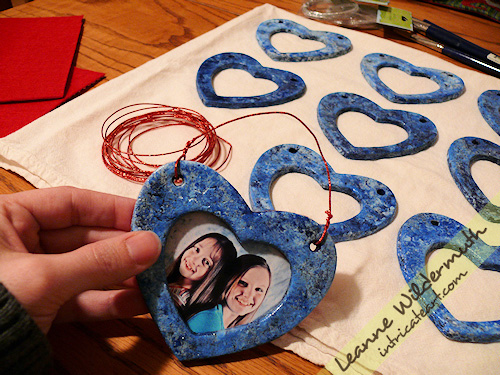
    Now I just take my wire (or ribbon, or hook, whatever you’re going to use) and wind it through the holes and around itself. I like to date my ornaments, this year I dated the back for everyone else and designed the front date of ours using a silver metallic sharpie, outlining in a black sharpie. Colored sharpies work GREAT for designing and decorating the fronts of these dough ornaments!

    photo dough ornaments by Leanne Wildermuth
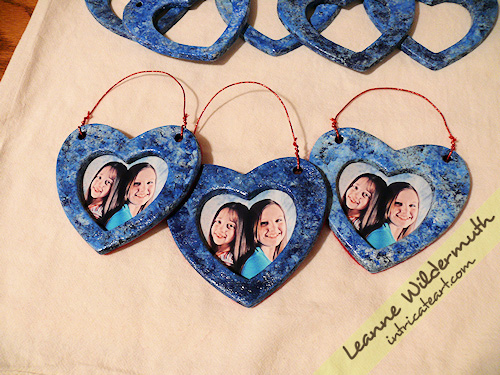
    Here are a few of them all assembled, aren’t they sweet? Once they’re all done, I slip mine into a sandwich baggie do they don’t get scratched or damaged. I store years worth of these in a heart shaped container, each individually wrapped, and they all still look wonderful!

    2001orn 2002orn
    2003orn 2005orn
    2006orn 2007orn
    dough ornaments how to recipe by Leanne Wildermuth
    Merry Christmas, everyone!!

    Get the latest updates – Subscribe by Email!

    Let Us Give Thanks

    November
    27
    2008

    Today is a day that reminds us that we have much to be thankful for every other day of the year. We stuff ourselves with food and surround ourselves with family and friends, we smile, laugh, and enjoy each other in a way that causes us to look inside ourselves and aspire to be appreciative and thankful more often.

    We take note of the wonderful lives we have, and the blessings that have been bestowed upon us that we might not have realized without this day. We’re reminded of the millions upon millions of people who have so much less, and are still thankful for what they do have.

    Some of us even turn our heads upwards and we show our gratitude to a good, gracious God that provides us with all that we need, and everyone we love.

    However you are spending your day, I hope you enjoy it. I pray it brings you warmth, love, and a satisfied appetite.

    Much love to you today,

    Me.

    Army Graduation Photos

    November
    1
    2008

    ft leonard wood leonardwood army base entrance sign photo Leanne Wildermuth
    The drive was not as long as I thought it would be, about 6 hours from my house to Fort Leonard Wood, Missouri. The scenery? UN-believable. What a beautiful time of year for that road trip! Illinois was boring until we got to Peoria, then boring again until we hit the St. Louis area. Thankfully, I had my mom in the car with me so I had plenty of entertainment! ha!!

    We arrived Wednesday, late afternoon, and checked in to our hotels. I had chosen a dive, based on a completely misrepresented photo online – so reservationist beware. It cost me some bucks to cancel, and I did some begging for a room at a nicer place. I even got the military discount, without having my ID card. Whew! Thank God for small favors!

    Much of my family made the trip, as well. Mark’s leave was canceled so he wasn’t able to come, but my Dad and his wife, my Mom, my sister and her family — and my brother all drove down to Missouri to see Brandi graduate from basic training. We met at a diner for dinner and yacked it up for a bit before heading back to get some sleep. We were up at Zero-Dark-Thirty (6AM, military style) to get together and yack more over coffee before heading to the base to wander around before the Graduation Ceremony.

    Keep reading »

    And You Smell Like One, Too.

    September
    22
    2008

    jayden with monkey cake birthday leanne wildermuth

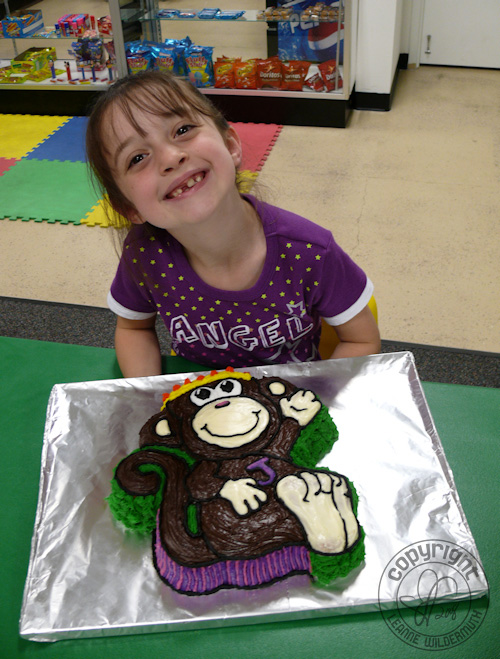
    Chickeymonkey thanks you very much for the wonderful birthday wishes! She had a lot of fun this weekend, and in fact her birthday is STILL being celebrated today at class with monkey brownies. Everybody has been ooh’ing and aaah’ing over this cake, and for anyone who wants to get creative with their next birthday cake, you can find tons of really neat cake molds right here at Wilton.com.

    The absolute highlight of the entire weekend? One of the girls hit a jackpot on those games that churn out tickets to be spent on cheesy plastic toys. The machine kept spitting out tickets, and she ended up with a pile about 3-4 inches thick. She was so excited, and then she had an idea. She said “I know! Why don’t we put everybody’s tickets together and then we can all get something!” So that’s what we did, we combined all the tickets, they counted them up, and each of the 9 girls got 80 tickets to spend. Chickeymonkey was first in line and wanted something that she didn’t have enough tickets for. So I asked everyone, if they got what they wanted and had any tickets left over, they could donate them to The Birthday Girl so she might be able to get the one she wants. Nearly all the girls had leftover and donated, and at the end of it all, Chick got what she wanted and had a few tickets left over for something else.

    I nearly cried at the generosity and giving spirits of these kids (there were 2 boys, too!). It was truly a heartwarming moment.

    After all the bouncing, cake, presents, pizza, smores, flashlight tag, shakes, movie, slumber party, church, grandparents, dinner at her favorite restaurant, laundry, and baking a monkey brownie for her classroom party today, I’d say it was a pretty busy weekend and I’ve got a very happy little 7 year old.

    And as for me? I’ll be diving in to my own very special project for a week or maybe two, and then I’ll be painting a whole bunch – starting with a custom cat portrait of a beautiful orange tabby, and I’m pretty excited!

    A ChickeyMonkey Birthday

    September
    20
    2008

    monkey cake chickeymonkey birthday leanne wildermuth

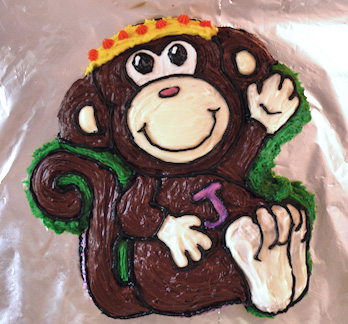
    Tomorrow, my little Chickeymonkey turns 7. Today, she and her friends will be bouncing and playing for hours. Yesterday, I spent the entire day working on this beautiful and tasty moist marble monkey birthday cake that I will be slicing into little pieces and serving to several children. I will be wiping monkey remains of off of the tables. Pieces of this fun little dude will be smashed and smeared into forks, plates, and ice cream puddles.

    The girls will squeal and giggle and ooh and aaah and not hesitate to devour him. Me, I’ll be sniffling, quietly, over my lost consumable masterpiece, and also, over my daughter – who is growing up so fast.

    It seems like just yesterday I was screaming at the nurses to go get the doctor because I was gonna push RIGHT NOW, WITH OR WITHOUT HIM. Just hours ago that I received my baby girl swaddled up in a warm receiving blanket and listened to her squeak like a mouse. Moments ago that the nurse took her from me to “have that checked” and seconds ago that I took her home after an emotional week in the NICU. Upon her arrival home and our first realization that there was dark hair covering every inch of her body, she became our sweet little Chickeymonkey. Seven years later, she’s stopped all the squeaking and is still covered in hair.

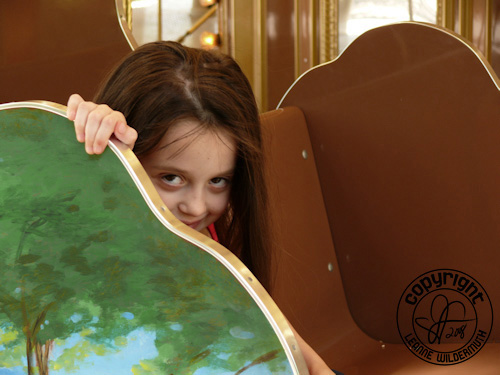
    jayden sly carousel photo leanne wildermuth

    Happy Birthday, Chickeymonkey! (A day early, even.)

    Pretty, Pretty, and Oooooh, neat.

    September
    19
    2008

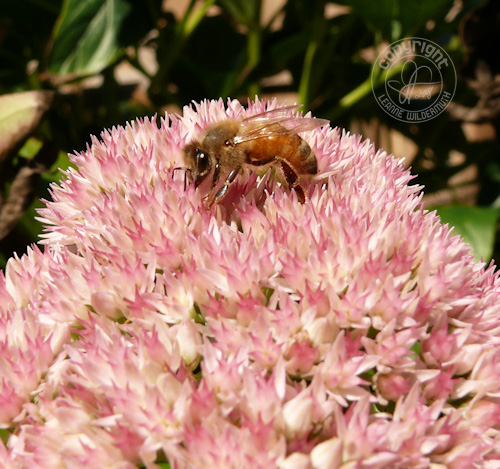
    stonecrop sedum honeybee leanne wildermuth

    If you’re looking for a plant that will attract bumblebees, honey bees and butterflies – this one does it all. My favorite aunt gave me a bit of Sedum from her landscape in the Spring of 2007, and it has quadrupled since I brought it home and put it in the yard. I was surprised last fall to see so many honey bees working on this plant, and this fall it’s gotten even busier! I’ll be splitting this in a couple of weeks and spreading them out more with my Bee Balm.

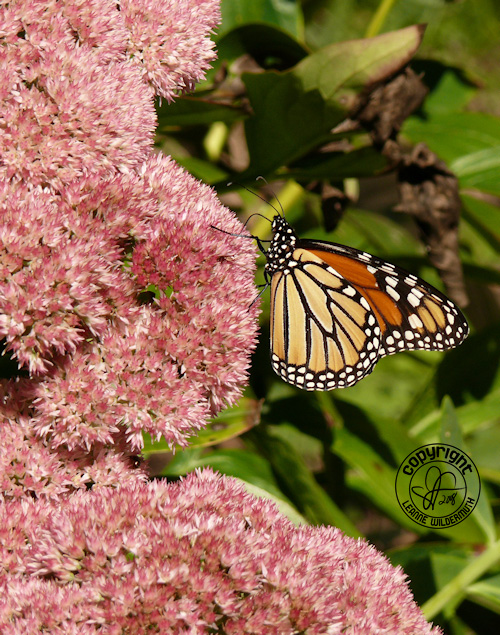
    stonecrop sedum monarch butterfly leanne wildermuth

    I am not sure if my butterfly bush has brought the Monarchs to my yard and the Sedum has kept them coming back, but it sure is a beautiful sight to see three of them sitting atop the Sedum. I loved this shot, the dense blushing pink blooms bordering that gorgeous butterfly.

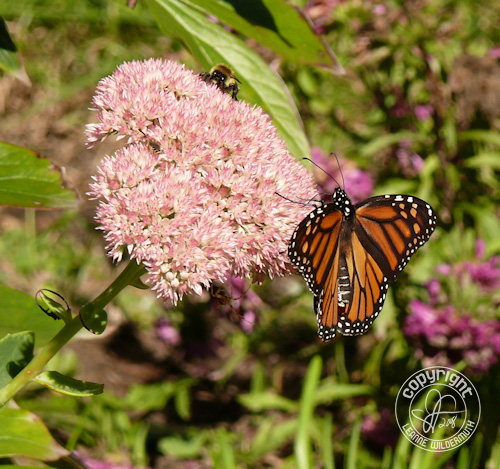
    stonecrop sedum monarch butterfly leanne wildermuth

    Usually, when Monarchs have landed, they keep their wings tightly closed, and they open and close like a trap door. I managed to capture this one with its wings open, so this is a rare shot for me and I’m loving the paper thin dimension!

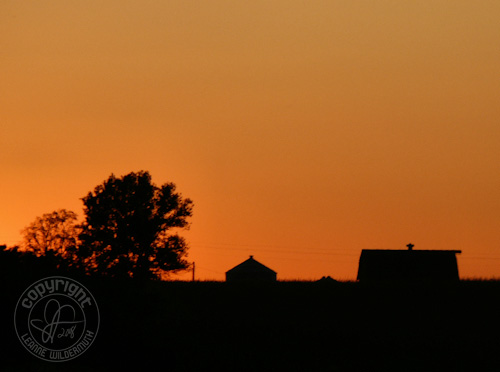
    illinois farm horizon sunset leanne wildermuth

    It has been a really busy week, to say the least. I’m waiting for a cake to cool right now because this afternoon I’ll be decorating this Monkey cake for my Chickeymonkey’s 7th birthday party tomorrow. I’ve driven hundreds of miles, going to Catybug’s volleyball game (an away game, 150 miles round trip), spent a day with a dear old friend from High School that I haven’t seen in –ummm– several years (here we are), mowed the lawn, went to another Volleyball game lastnight (we won!) and finished up a blog design for EW. All since my last post on Tuesday!

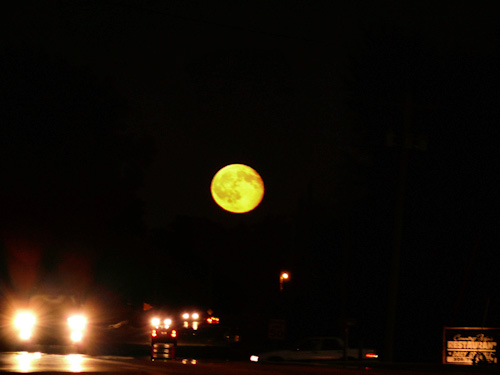
    illinois september low moon 2008 orange leanne wildermuth

    The sunset was beautiful on Tuesday night, I snapped the farm silhouette on the way home, driving on the freeway. When we got to our exit, the sun had completely set and the moon popped up on the horizon, big, bold, and this really wild yellow-orange color. I left the cars & headlights in the photo so you could get a perspective on how low it was and how bright and oddly colored! Is this our harvest moon? I recall it being much more orange. Anyone else catch a glimpse of the moon this week?

    The timer just went off, so it’s time for me to whip up a batch of frosting!

    {Latest Projects}