Please visit my new, improved website!

>> Wildermuth Creative Portraits <<

  • Life, Love, and Critters – of course!

    2009 – Yours for the Making.

    January
    1
    2009

    Happy New Year, friends! It’s a new day, a new year – and it’s ALL YOURS! I cannot express to you how much I wish I could reach into each of your lives and make all things go well for you this year.

    Here are a few of the things I’d grant you, if I could:

    • Peace. In your life, in your heart, in your mind. The kind of peace that makes you smile, just to feel it.
    • Harmony. Between the people you love and those you interact with. That each interaction you have this year fill you up, that arguments fall to the wayside, that unpleasantries disappear.
    • Love. Enough love to pass around, with no expectations, no conditions, and no judgment.
    • Success. The success you seek in your personal life, in your professional life – that it be all that you need to sustain you and give you momentum.
    • Creativity – of course. The eye to appreciate the things around you, the vision to see what could be, and the spark to make it happen.
    • Passion. The passion you need to achieve your goals and find that which brings you to a better place, in your life and in your heart.

    My wish for you is that each new day gives you more reason to look forward to the next, that the people around you see a new light in your eyes, and renewed confidence and spirit. That you remain invigorated, excited, and optimistic about yourself, your life, and the people who surround you.

    Much love to you!!

    Get the latest updates – Subscribe by Email!

    My Golden Ticket

    December
    27
    2008

    Life's Golden TicketMy daughter started reading this book, Life’s Golden Ticket, at Grandma’s house on Christmas day. She continued reading in the car on the way home, and sought out a quiet place and kept reading until she finished it later on that night. She brought it out to me and said “here mom, you have to read this book.”

    Those of you who know me well know that I’m not much of a bookworm. If I find a series that I like, it sucks me in and I don’t come out until it’s finished – which doesn’t make me a very productive person! The last series that I read, Left Behind, did just that.

    When Catybug suggested I read it, I looked at her face and saw the look. My mother-in-law had read it, my niece read it – they both recommended it as well. There was obviously something about this book that made her dive in and not stop until she’d reached the last page. She’s an avid reader – so that’s not unusual, but she never asks me to share her books with her.

    She asked me a few times yesterday if I’d started reading it yet. She even set it on my desk. Then, after dinner, she moved it into the family room and set it on the side table next to “my spot” on the couch.

    I picked it up – during an episode of House no less – and started the first chapter. It had me in the first few pages, and when midnight hit lastnight I was surprised that the book was over so soon. In just a few hours, I took a trip to another place with these characters, and I was absorbed and intrigued by the new, different view I had on life and people.

    “Hey, listen, sometimes you got to call it like it is. There is no real you versus fake you. No real self versus fake self. You are who you are, wholly and completely. All your emotions and behaviors are a part of who you are now. Unless you accept every aspect of that, you’re lying to yourself. You’re avoiding yourself. Maybe you don’t like parts of who you are, portions of what you just saw, but those are portions and parts of you until you change them. You’ve got to admit that even the bad parts are parts of you. Otherwise, you’ll never change.”

    * * * * *

    “…you’ve got to stop the cycle. You can’t keep giving this behavior energy. You’ve got to refuse the path of least resistance. You’ve got to put the brakes on this behavior, or your same story of suffering will just keep looping over and over. It’s time you start expressing how you feel and what you want. That will start a new cycle for you. And you can’t just express yourself now and then. You’ve got to do it from now on. You’ve got to start building momentum – then you’ll be unstoppable. Just break the cycle of silence and suffering. Start a new cycle of strength by expressing to the world how you feel and what you want. It’s the only way you’ll ever live the life you want.”

    There’s nothing more bold than seeing your life pass before your eyes while you’re reading a 208 page novel.

    There’s also nothing better than finishing a book and talking about it with your child, asking them what positive and negative events might shape their present, and how you might address those negative events to better impact their future.

    I imagine everyone who reads this book can identify with it. I was faced with the reality that I am not the only person who carries their past forward through behaviors and reactions. That I don’t consider how others pasts have shaped them, how we allow repeated negative impacts to impact us much more definitively than we allow the positive in our lives push us forward with new momentum.

    How I wish I could get up on that tightrope and put one foot in front of the other, forging a new path, braving the height for the sake of change.

    As the end of 2008 draws near, the timing of this story couldn’t be better. As I finished adding items to my portfolio this morning and finishing a couple of small projects, my mind kept spinning. Where do I want to go? What do I want to do? How can I make a bigger, better contribution to the world?

    Now is the time to stop allowing the circumstances of my past to dictate my situation and get to work on becoming the person — the mother, artist and wife — that I want to be. To make that list of changes, to keep it in front of me and be ever mindful of how every action, and reaction, will determine my future.

    I am really looking forward to 2009. How about you?

    How To Make Photo Dough Ornaments

    December
    23
    2008

    dough ornaments how to recipe by Leanne Wildermuth
    Every year (since 2001), I’ve made these beautiful dough ornaments for our Christmas tree. This year I want to share with you my whole process, in case you’d like a crafty project or gift idea. It really is an any occasion craft, you can use different shapes, cutouts, themes and decorations to make it suit whatever you have going on. It’s a wonderful and sweet handmade gift!

    The first part of the project (which I failed to take photos of) involves the dough ornament itself. First, you’ll need to pick out your shape. I have nested heart cookie cutters, so I chose the biggest one, and the second to smallest so that I have enough room for the girls photo. (I take the girls Christmas photos myself in my studio the day before.) Here’s my ornament shape:
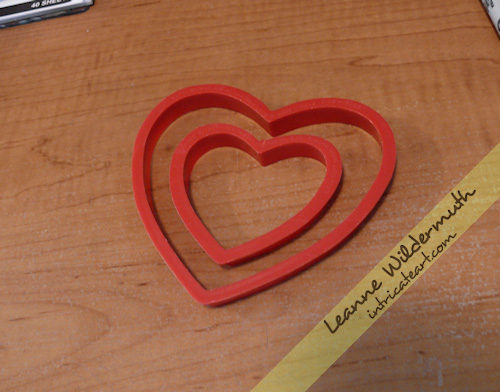
    heart shaped cookie cutter
    The next task is making the dough – which is super easy. In a large bowl, combine 2 cups flour, 1 cup salt – and then add in 1 cup of water as you’re kneading the dough. This will make enough dough for about 10 of my ornaments, but I double the batch so the girls can make their own ornaments each year, too. Knead the dough really well, so it’s pliable and easy to manage.

    Whatever surface you’re working on, you want to be able to get your dough up easily. Use a flexible cutting board, or wax paper to lift it off the table and peel back away from the back of the ornament. Put a little flour out on the surface and roll your dough to about 1/4″ thickness. If it’s cracking, you can dust some flour on it and then spray with a mist of water from a spray bottle, smoothing over with your hand.

    Create your shapes using your cutter, and transfer them to an ungreased cookie sheet. To make holes for ribbons or hanging wire, just pop a hole into the shape using a straw, not too close to the edge so the dough doesn’t crack or break over time.

    Before you bake them, use a toothpick to go around the edges and clean off any jagged dough edges. Once these dry, they take a bit of work to file off – so do as much beforehand as you can.

    Bake your ornaments at 200 degrees for 2 hours. When they’re done, let them cool to the touch. Then, if you need to, use a nail file/buffer to clean off any jagged pieces from around the edges.

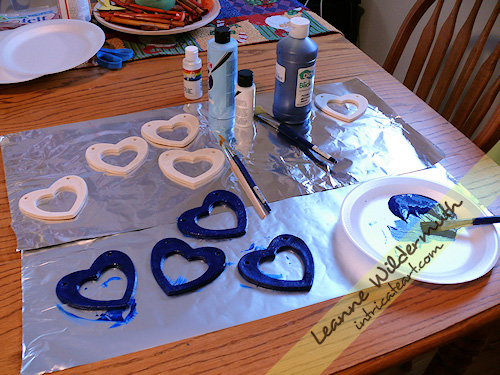
    Now, you can prep your creative surface for painting! I use aluminum foil or wax paper to make it easy to move them around as they’re drying.
    dough ornaments how to recipe by Leanne Wildermuth
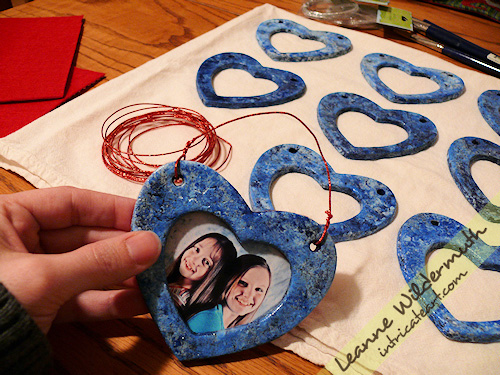
    I’ve got my base color, dark blue, on a few of my ornaments already. The design is different each year, and usually I know how I’m going to paint them and have all of my materials/paints/backing/wire purchased before I start my project. Since my photo backdrop is a mottled blue, I decided to follow it through to the ornament. It’s also flecked with red, so I chose a red self-adhesive felt backing paper and red decorative wire.
    dough ornaments how to recipe by Leanne Wildermuth
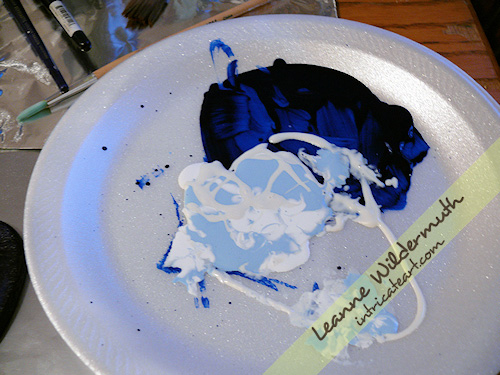
    Here’s my palette. I’ve got the dark blue drying, and I’m going to “sponge” on a light blue, white and pearly glaze. These are all acrylic paints you can pick up at Hobby Lobby for a couple of bucks. You really don’t need much, the small bottles are perfect. I put the paint on top of the other in a crazy pattern so it transfers to the ornament randomly. I paint through the holes and around to the back a little bit, just in case any edging shows through.

    Prepare to get messy! I just wadded up a paper towel for this part, just dab it onto the plate and then onto the ornaments.
    dough ornaments how to recipe by Leanne Wildermuth
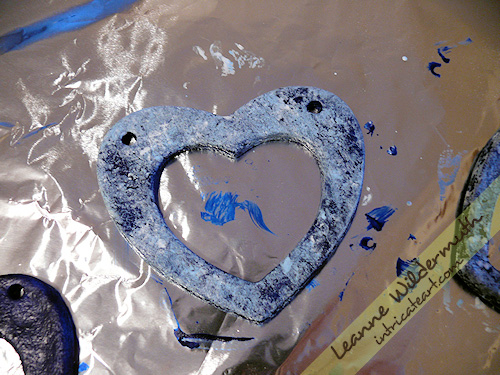
    Here’s how they look after the first coat. It’s a bit too light, so I let it dry (acrylic takes a minute or two to dry) and add another coat of the dark blue over the top.
    dough ornaments how to recipe by Leanne Wildermuth
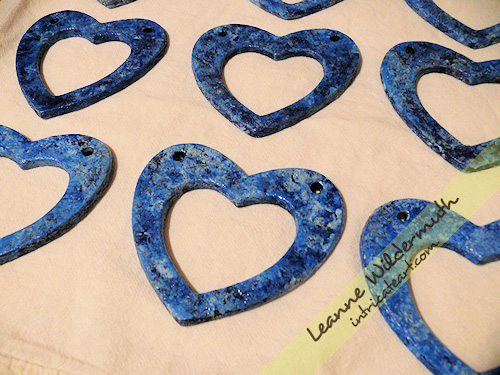
    Once I finished blotting them and allowed the paint to dry, I went over the ornaments with a coat of Mod Podge to give it a really glossy lustre. This seals the dough and helps it last longer, too!
    dough ornaments how to recipe by Leanne Wildermuth
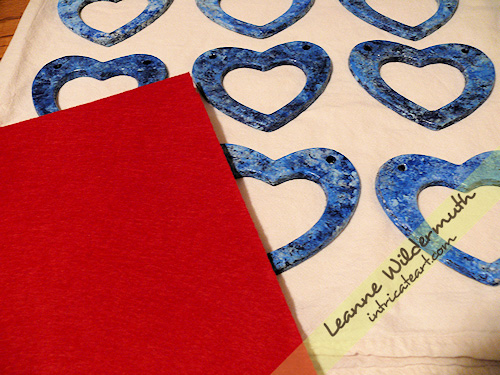
    Next, I get the self-adhesive felt out. (I found mine at Hobby Lobby in the crafting area with all the felting tools.) I wish I had found this stuff years ago!! It made the whole process wonderful and opens up a variety of ways that these ornaments can be made and used.
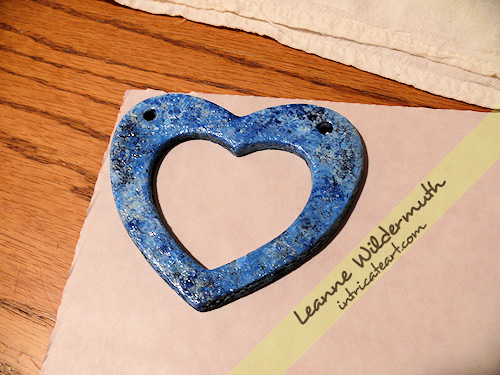
    dough ornaments how to recipe by Leanne Wildermuth
    Flip the felt over, and trace the outside of your ornament and mark the holes. Just do one at a time, because they do tend to all come out different based on how they cook, if they’re slightly misshapen in the transfer to the cookie sheet, etc.
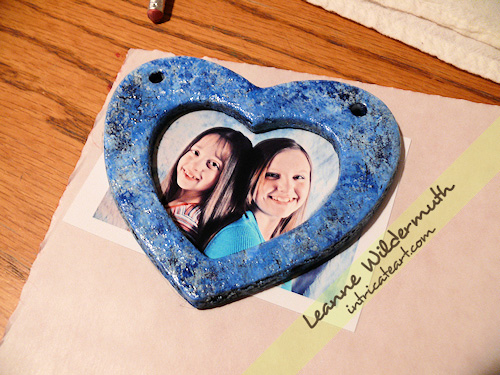
    dough ornaments how to recipe by Leanne Wildermuth
    I’ve printed the girls photos and sized them so that they’ll fit perfectly inside my little “window”. I set the photo under the opening and trace the opening onto the photo, then cut around it giving about 1/4″ overlap.
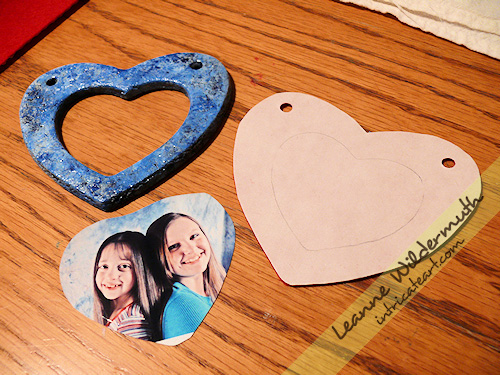
    dough ornaments how to recipe by Leanne Wildermuth
    I cut out the felt, used a hole-puncher for the holes, and have everything ready to assemble the ornament.
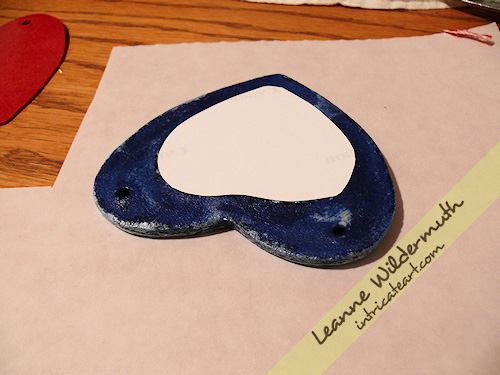
    dough ornaments how to recipe by Leanne Wildermuth
    Flip the ornament over, and align the photo to the backside, lifting to make sure it’s in position. Then just peel and stick your felt to the back, carefully lining it up to get it into position before pressing it down firmly onto the ornament.
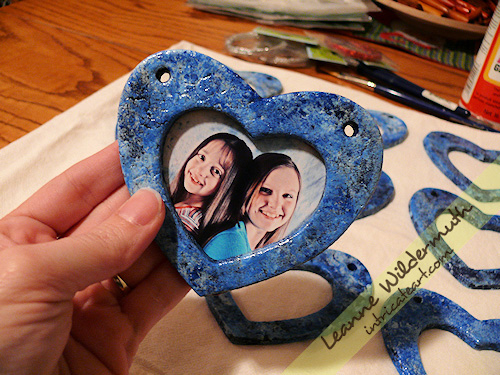
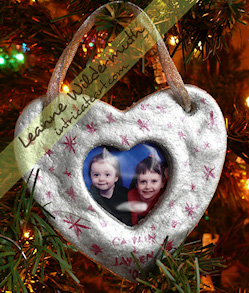
    photo dough ornament by Leanne Wildermuth
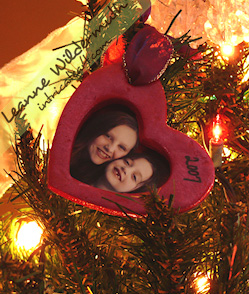
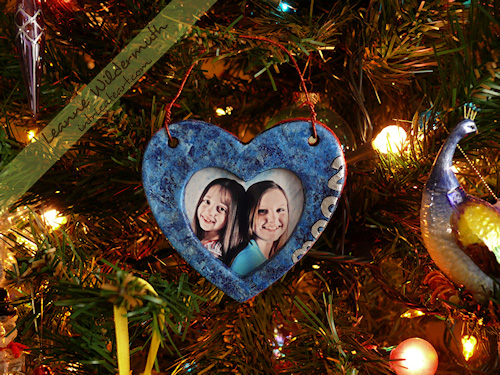
    Here’s the front side of the ornament.
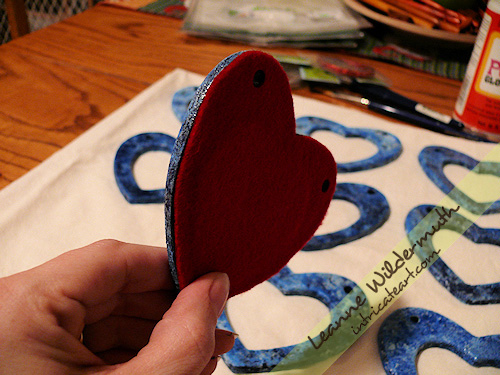
    photo dough ornaments by Leanne Wildermuth

    Here’s the backside, felted.

    photo dough ornaments by Leanne Wildermuth

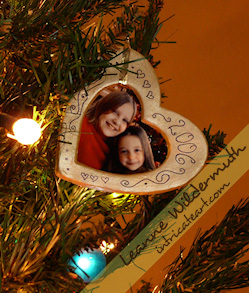
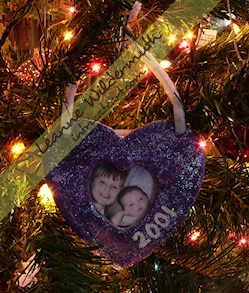
    Now I just take my wire (or ribbon, or hook, whatever you’re going to use) and wind it through the holes and around itself. I like to date my ornaments, this year I dated the back for everyone else and designed the front date of ours using a silver metallic sharpie, outlining in a black sharpie. Colored sharpies work GREAT for designing and decorating the fronts of these dough ornaments!
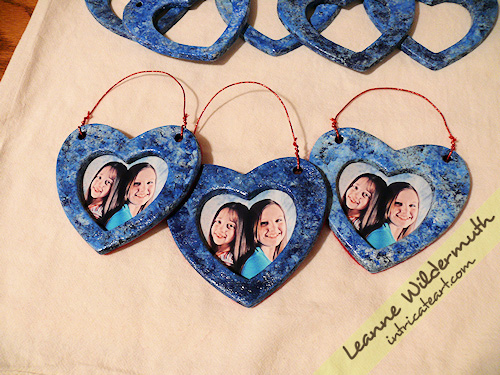
    photo dough ornaments by Leanne Wildermuth
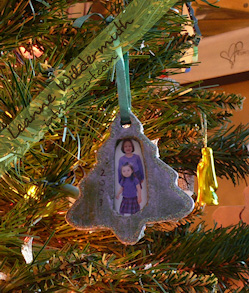
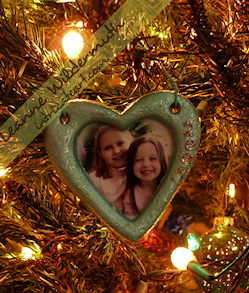
    Here are a few of them all assembled, aren’t they sweet? Once they’re all done, I slip mine into a sandwich baggie do they don’t get scratched or damaged. I store years worth of these in a heart shaped container, each individually wrapped, and they all still look wonderful!
    2001orn 2002orn
    2003orn 2005orn
    2006orn 2007orn
    dough ornaments how to recipe by Leanne Wildermuth
    Merry Christmas, everyone!!

    Get the latest updates – Subscribe by Email!

    A Christmas Surprise Video

    December
    21
    2008


    For those of you not on Facebook (is there anyone left?) I wanted to share this video with you. We took a surprise trip up to the Chicago area this week to present my Mom and sister with a little early Christmas present. So without giving any more away, enjoy the show!

    Holdman Christmas Show

    December
    16
    2008

     
    View more of the Holdman Christmas light displays here. They’re incredible!

    Mother & Daughter Portrait Complete

    December
    14
    2008

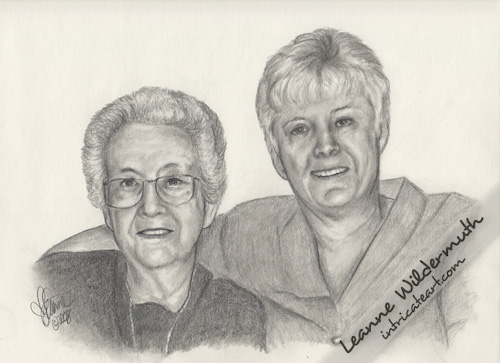
    Custom graphite pencil portrait Audrey and Janeice drawing by Leanne Wildermuth

    I’ve completed this pencil portrait of Audrey and Janeice, matted it and have it wrapped in and ready to present to Audrey today at Church. I’m not sure if all my little modifications are even noticeable to you, the eyes, a bit more blending in the skin tone and deepening, I’ve tweaked both of their noses – little things that seemed off to me as I kept looking back and forth from their photo to the drawing.

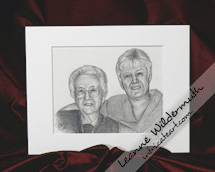
    custom graphite pencil drawing portrait mother and daughter by Leanne Wildermuth Here’s the piece matted and I’ve signed the matboard and it’s ready to drop into a frame, just in time for Christmas.

    It’s been a busy week here in the studio, I’ve tried to get away a couple of times to get some Christmas shopping done – I’m so glad I can do so much of it online! Today I’ll be getting another piece ready, I’ll be drawing a brindle Pit Bull named Josie over the next week. I’ll also put together my Handmade Gift Exchange packages (Catie joined in on the fun, and her gift is just so cute!), get a hundred or so Christmas cards and postcards addressed, and attend the girls Church Christmas Program later on in the evening.

    If you’re on Facebook – I did get the girls Piano Recital videos uploaded to my wall – go have a peek if you haven’t already, I’m so proud of them!

    I hope you’re all doing well – and that you’re getting everything in order for the Holiday without panic! It always seems there’s less and less time every year, doesn’t it?

    A Lotta Little Things

    December
    9
    2008

    Hey! How are you? Me? I’m well, thanks. It’s been a few days. Why has it been a few days? Hm. Well, I have a mild Facebook addiction (You don’t? Then you haven’t joined yet. You can thank me later.), I’ve even made a page, where you can become my fan.

    Now, lest you think I spend every waking hour updating my status on Facebook, I have to show you that I have, indeed, been working! I’ve finished up a site design for Houston Photographer Patrick Bertolino. The design itself is simple, it’s the gallery that makes it what it is – and it’s his own Photography that makes the site delicious. You have to see his work! Go! I’ll wait.

    I’ve also started another drawing, and have been doodling a bit on a custom dog illustration to be used on a previous client site. Very interesting things going on over here!

    Last Friday, a very large package landed on my doorstep. Four new backdrops for my pursuit of studio photography! I will be revamping my studio to better accommodate portrait and still life sessions. I’m really excited about that, and will update you (and my site) when portrait packages and studio sessions are available.

    I’m expecting another shipment in the next day or two – of course that would be the Christmas Postcards that I designed, and I’m so excited to send! If you received a card from me last year, you’re still on my list. If you’re a regular here, I am going to ask you to click on my “contact” form and don’t be shy about sending your address! I’d love to share my card with you this year!

    I’ve also heavily discounted my “Eye Ate It” Series as well as Kiki, my beautiful Calico Cat painting in my Etsy Store, so there’s still time to give something sweet to someone you love for Christmas!

    * * *

    Those of you participating in my Handmade Gift Exchange, you received your partners last week. Just want to remind you that your Handmade gifts should be in the mail by the end of this week (the 14th), beginning of next at the very latest to be sure they reach their destination in time for Christmas. I’m really excited to see how it goes, and would love to see photos of your gifties, too! If you haven’t received your partner, then something has gone amuck. Please let me know if anything is amuck, as I have a brand new box of Hello Kitty band-aids, and I’ll fix it right up.

    * * *

    On the home front, we’ve all had the flu here, and I’m glad to see it depart our household. It’s a nasty bugger! I hope that none of you are down with this!

    The girls have piano recitals tonight so I’m really looking forward to that – they’ve got brand new dresses, of course, because you can’t wear the same dress twice. I’m raising my girls up right, you know! I’ll get video of them and post it to my Facebook. Catybug will be playing a tune herself, as well as accompanying another wonderful young pianist with vocals.

    It’s going to be a good day, as long as this rain doesn’t turn to ice!

    Update: I’ll be making my annual dough ornaments this afternoon. I gave the recipe a couple of years ago but here it is again, for those of you who are :cough: bored today and want something creative and fun to do!

    DOUGH ORNAMENTS
    2 cups flour
    1 cup salt
    1 cup water

    Knead, add more flour to make it really doughy if needed, sprinkle water to make it more pliable as needed. Roll on very lightly floured surface, cut shapes using regular cookie cutters of your choice, bake at 250 for 2 hours.

    Handy & Creative Tips:
    – Roll them out on the backside of a non-stick cookie sheet so they don’t need to be transferred to the sheet.
    – Fill in any cracks with water, smooth with your finger.
    – Use a straw to punch out holes for ribbon before you bake them.
    – Once completely cooled, paint them using metallic craft paint, or use a shimmery iridescent glaze over a solid color.
    – Glue foil to the back to reflect the lights on the tree
    – Use glitter sparingly to make them shiny
    – String with ribbon and hang them on the tree!


    Get in the Christmas Spirit!
    Now Playing : Oh Holy Night

    [audio:ohholynight.mp3]

    Lee Jeans : The Winners Are…

    December
    1
    2008

    I’ve just drawn ten random numbers from all entries using this random number selector.

    Here are the numbers/winners of these awesome Lee Jeans!!

    12 : Taba
    72 : Grace @ Sandier Pastures
    81 : Mary Beth I
    70 : Lady Lu
    20 : Becky
    17 : Mir
    66 : MomW
    91 : Charlotte (Life’s a Charm)
    5 : Usedtobeme
    61 : Patois

    Congratulations!!!! I’ll be dropping you an e-mail to get your size, color preference and mailing address!!

    Here are your choices:

    The One True Fit premium bootcut comes in four different washes: Union Blue, Blackdigo, Shadow Blue, and Galaxy blue. Union and Blackdigo are darker and Shadow and Galaxy are more of what you think of when you think “blue jeans.” These are available in sizes from 2-16, short, medium or long. The plus size scale ranges from 16w to 26w, available in short or medium. For this jean, there is also a petite scale from 2-16.

    Lee one true fit jeans

    Thanks to everyone for participating!

    Let Us Give Thanks

    November
    27
    2008

    Today is a day that reminds us that we have much to be thankful for every other day of the year. We stuff ourselves with food and surround ourselves with family and friends, we smile, laugh, and enjoy each other in a way that causes us to look inside ourselves and aspire to be appreciative and thankful more often.

    We take note of the wonderful lives we have, and the blessings that have been bestowed upon us that we might not have realized without this day. We’re reminded of the millions upon millions of people who have so much less, and are still thankful for what they do have.

    Some of us even turn our heads upwards and we show our gratitude to a good, gracious God that provides us with all that we need, and everyone we love.

    However you are spending your day, I hope you enjoy it. I pray it brings you warmth, love, and a satisfied appetite.

    Much love to you today,

    Me.

    {Latest Projects}