aka “How to furry up your bald cat.”
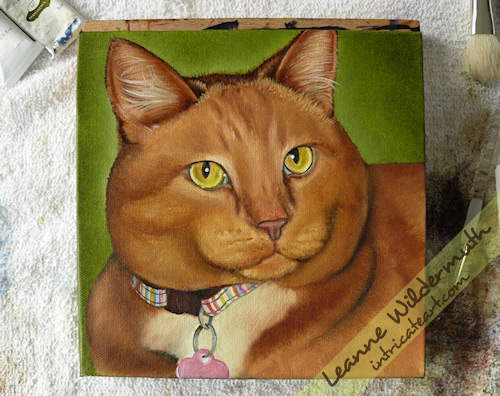
From my previous work in progress, you can go ahead and admit it – you were frightened. It is hard for some people to envision my finished portrait when they view the underpaintings, and that’s okay. I mean, as long as no one is scared off by it! After sharing the final digital pic of the finished portrait with my client last night, I realized that you really do have to know my work, and in a lot of cases you have to own one of my paintings, in order to overlook the craziness that is one of my underpaintings.
So for Kona’s portrait, I decided to stop every so often and snap a photo, and share my entire work in progress. If you’re an artist, and you want to take this as a “how to paint a cat portrait”, then I do hope this helps you. I’ll try to detail out my thought process through the painting so you can get an idea of how I work.
The first step (after the sketch and background are complete), is to determine your palette. I posted the colors I chose for this painting in my first work in progress. I work in the base underpainting and try to get the eyes and nose in a near-complete stage during the underpainting stage as I want to spend more time making them glassy during the next stage, as that’s not as easily done when you’re painting wet in wet.
The underpainting consists of what I see underneath the fur in the photograph. I do deepen this as I paint in the fur, as well – I look at it as more of a canvas cover, to fill in the texture of the canvas so that each piece of fur stands out more. I allow the underpainting to dry fully before I start the next stage.
Thinking of your subject as he/she is in life, they are three dimensional. So when painting, I always keep this in mind and start from the back and work forward. This gives my pieces depth and life. The third progress shot above shows the ears and top of the head in their completed stage, then I move down the face.
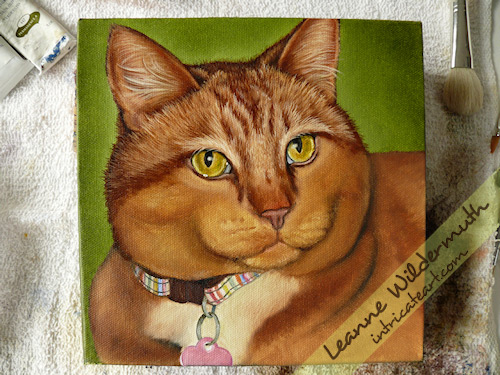
In the progress shot above, I’ve completed the top of the head, ears, and moved down the forehead to the eyes. My palette has several mixes at this point, pulling in ochre, orange and umber, adding Naples yellow to my palette and pulling in tiny bits of white when I for the fur that is catching the most light. I’ve deepened the eyes and added sap green and orange flecks, working the shadows and lightening up the creamy yellow to make them shine.
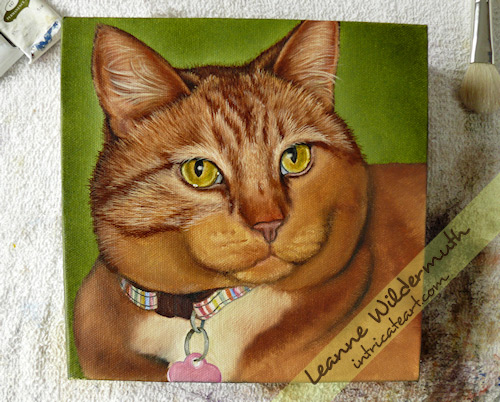
Working in the right cheek, I’ve actually turned the painting sideways to work from the side of her head forward to her nose. I pull the fur through using a liner brush, starting with mid tones, going back over with lights, and then filling in any gaps with the darks to give depth and shadow.
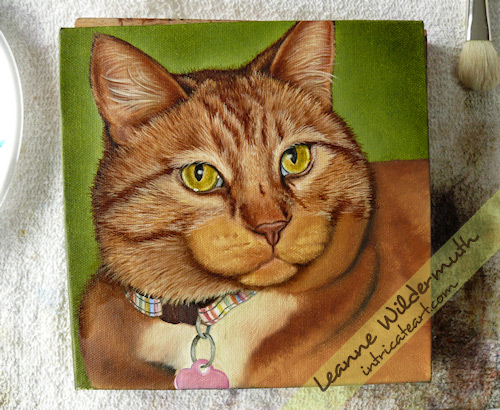
Here I’ve worked in the left cheek and gone back to the right neck area. I’ve also added the tiny short fur to the nose and finished up the nose. Not working the mouth quite yet – because that is in the foreground.
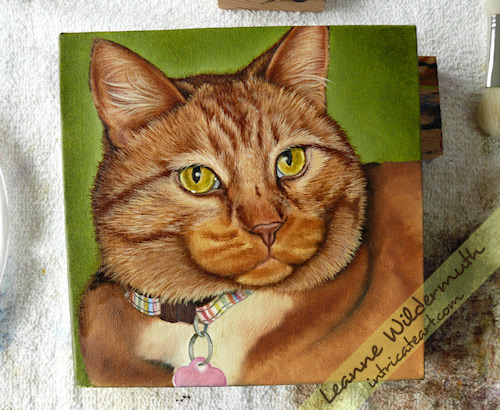
Here I’ve finished up the neck and cheek area, now I’ll work in the chin.
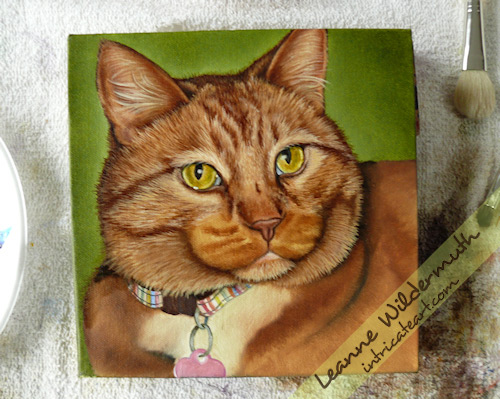
I’ve completed the lower shadow over the neck, laid fur over the top of it, then moved up to the lower lip. Since the mouth is the most forward feature on the face, I save it for last.
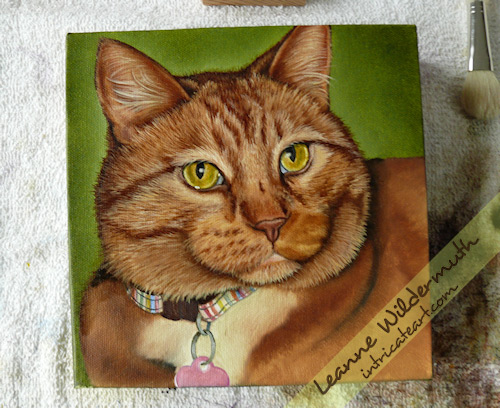
Turning the painting sideways again (as well as my reference photo), I start from the neck and cheekbone and work forward to the nose on the right side of the mouth, darkening in the rows for the whiskers.
The left side of the mouth is complete, now I’ll continue moving down the painting, working in the collar.
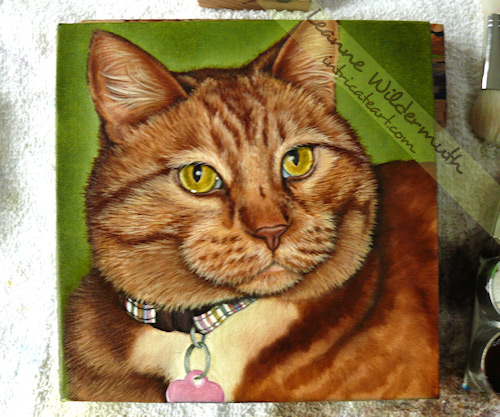
I’ve darkened the collar and right shoulder, adding the prominent fur to the shoulder and chest area on the right side. I’ll move across the painting to the left side now, working from her back forward to her chest. I’ve added more darks to the left side to pull them through with the lighter colored fur as I work. Still using my liner, still painting each hair one piece at a time, layering medium, lightest and then darkest through the body. The lightest tones pull the dark upward, painting wet in wet, so it lightens but still appears darker against the foreground.
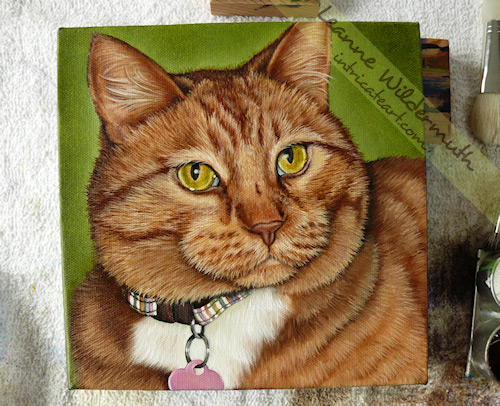
The chest hair, because it is “white”, comes last. It isn’t really white, however, it is cream. A very light mixture of Naples yellow and white against shadowed chest hair (which consists of french ultramarine, sap green, white, and a bit of indigo). I feather the bordering hair into the orange with a feather brush (which is impossible to find, called eagles wing), and then overlay the whitest white with the liner brush.
Once the chest hair is finished I complete the last bit of Kona that is most in the foreground for her chest area, which is the ring and tag. I work these in very carefully, setting my wrist on a block of wood so I don’t disturb the surrounding wet fur.
At this point, you’d think I was finished. But there are two more very important parts to this painting to make Kona come to life. Whiskers are always last (not counting my signature, and only when the whiskers do not need to overlay my signature). I go through the painting again, with my liner and my whitest white (a very very lightened Naples), I turn my painting so that I am drawing my liner brush toward myself as I paint in each whisker. Once the whiskers are complete, I sign the piece – which can take up to a half hour if I’m being really picky!! For Kona, I repainted my signature once. Sometimes I will repaint my signature two or three times until I am pleased with it. Wierd, huh?
The results, from start to finish:
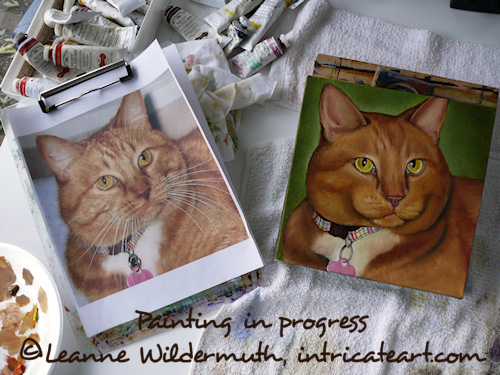
Before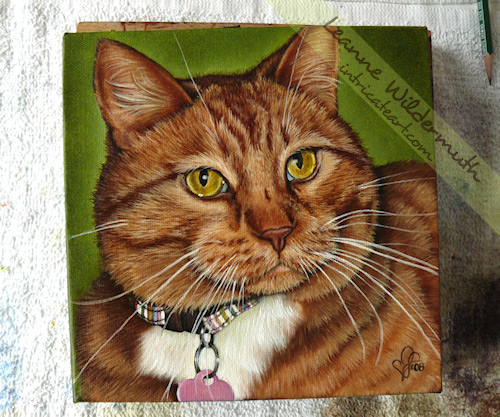
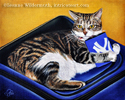
Kona’s completed portraitAnd that, friends, is how I transform a frightening bald looking cat underpainting to a furry, realistic and lovable lifelike portrait. I hope you enjoyed my little tutorial and work in progress!


{11 Comments}
Oh, wow! Yes, I was afraid for that poor bald looking thing! But look at Kona now!! Beautiful work! You continue to amaze me with each subsequent portrait!
:clapping: :clapping: :clapping: :clapping: :clapping:
“It is hard for some people to envision my finished portrait when they view the underpaintings, ”
That is so true! I remember when you painted our heron (lol), and I saw that strong blue background. I wasn’t sure WHAT you had in mind, and I was a little worried because it didn’t make sense to me at all.
I’m the kind of person who gives the artist the benefit of the doubt,because I know they can “see” in their mind’s eye just what they’re going to create, So I just sat back and waited.
And just like this painting of this most gorgeous puffy kitty here, whose cheeks I’d like to rumple, it all came together beautifully in the end.
Great job, Leanne!
:thumbsup:
Another “well done”! :thumbsup: I really liked seeing the progression summary…all the stages in one post.
Kona is beautiful! But we knew that already, didn’t we? (I love me some marmalades!)
Thank you for sharing your painting process with us! I want my mom to read this because 1) she’s a painter, too, and 2) she’ll appreciate the lesson.
Now, I guess I better go out and get inspired to do something today.
You’re the best ‘fur lady’ I’ve ever seen. This is a great DIY post and you’re very generous to share the steps with us. Gawd, I wanna reach out and pet the cat!!
This is a great job .Good to see back with your painting.:
another beautiful kitty! I’m sure the owner is tickled pink.
You are just so amazing that sometimes it takes my breath away. :hug:
Wow, Leanne! Awesome, awesome, awesome. Kona looks so fabulously furry! :cheerful: I just want to reach out and pet her. Thank you so much for sharing your WIP’s. This painting rocks. :yahoo:
Very cool. Nice finished portrait and it is very cool to be able to see the work in progress. This type of simple thing is really what makes blogs so great – the ability to see perspectives that were not readily available before.
:cat:
Sorry, comments are now closed.