Please visit my new, improved website!

>> Wildermuth Creative Portraits <<

  • How To Make Photo Dough Ornaments

    December
    23
    2008

    dough ornaments how to recipe by Leanne Wildermuth
    Every year (since 2001), I’ve made these beautiful dough ornaments for our Christmas tree. This year I want to share with you my whole process, in case you’d like a crafty project or gift idea. It really is an any occasion craft, you can use different shapes, cutouts, themes and decorations to make it suit whatever you have going on. It’s a wonderful and sweet handmade gift!

    The first part of the project (which I failed to take photos of) involves the dough ornament itself. First, you’ll need to pick out your shape. I have nested heart cookie cutters, so I chose the biggest one, and the second to smallest so that I have enough room for the girls photo. (I take the girls Christmas photos myself in my studio the day before.) Here’s my ornament shape:
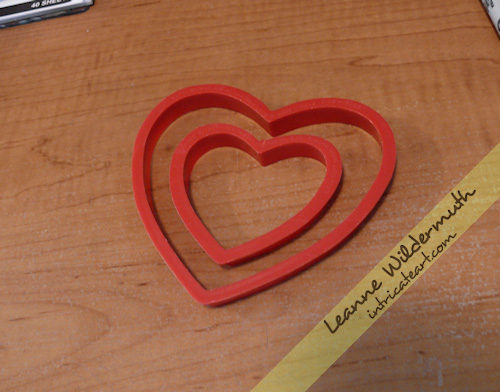
    heart shaped cookie cutter
    The next task is making the dough – which is super easy. In a large bowl, combine 2 cups flour, 1 cup salt – and then add in 1 cup of water as you’re kneading the dough. This will make enough dough for about 10 of my ornaments, but I double the batch so the girls can make their own ornaments each year, too. Knead the dough really well, so it’s pliable and easy to manage.

    Whatever surface you’re working on, you want to be able to get your dough up easily. Use a flexible cutting board, or wax paper to lift it off the table and peel back away from the back of the ornament. Put a little flour out on the surface and roll your dough to about 1/4″ thickness. If it’s cracking, you can dust some flour on it and then spray with a mist of water from a spray bottle, smoothing over with your hand.

    Create your shapes using your cutter, and transfer them to an ungreased cookie sheet. To make holes for ribbons or hanging wire, just pop a hole into the shape using a straw, not too close to the edge so the dough doesn’t crack or break over time.

    Before you bake them, use a toothpick to go around the edges and clean off any jagged dough edges. Once these dry, they take a bit of work to file off – so do as much beforehand as you can.

    Bake your ornaments at 200 degrees for 2 hours. When they’re done, let them cool to the touch. Then, if you need to, use a nail file/buffer to clean off any jagged pieces from around the edges.

    Now, you can prep your creative surface for painting! I use aluminum foil or wax paper to make it easy to move them around as they’re drying.
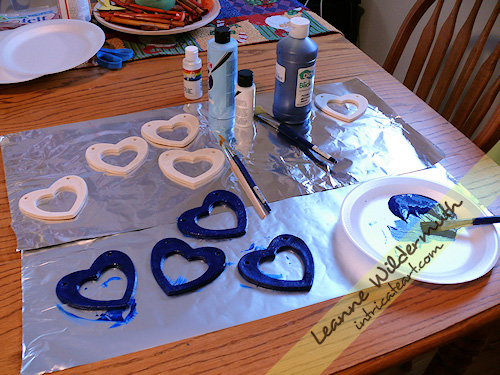
    dough ornaments how to recipe by Leanne Wildermuth
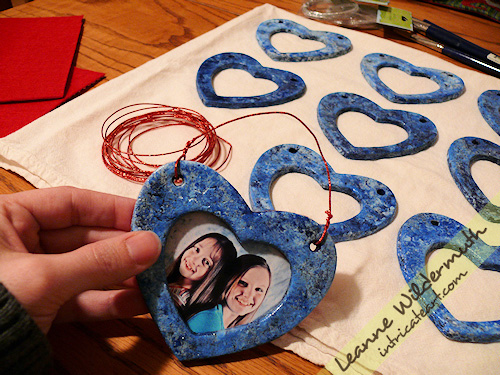
    I’ve got my base color, dark blue, on a few of my ornaments already. The design is different each year, and usually I know how I’m going to paint them and have all of my materials/paints/backing/wire purchased before I start my project. Since my photo backdrop is a mottled blue, I decided to follow it through to the ornament. It’s also flecked with red, so I chose a red self-adhesive felt backing paper and red decorative wire.
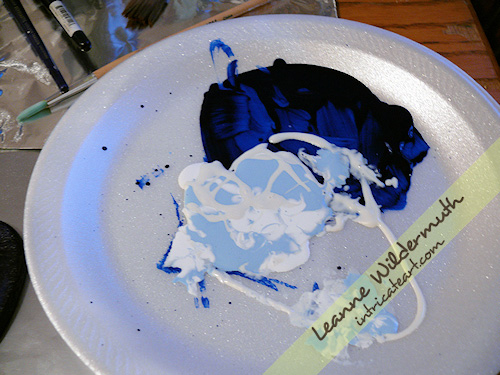
    dough ornaments how to recipe by Leanne Wildermuth
    Here’s my palette. I’ve got the dark blue drying, and I’m going to “sponge” on a light blue, white and pearly glaze. These are all acrylic paints you can pick up at Hobby Lobby for a couple of bucks. You really don’t need much, the small bottles are perfect. I put the paint on top of the other in a crazy pattern so it transfers to the ornament randomly. I paint through the holes and around to the back a little bit, just in case any edging shows through.

    Prepare to get messy! I just wadded up a paper towel for this part, just dab it onto the plate and then onto the ornaments.
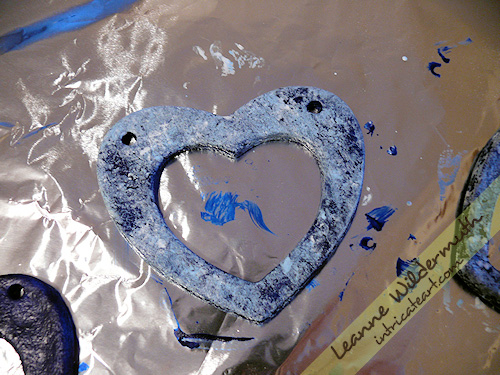
    dough ornaments how to recipe by Leanne Wildermuth
    Here’s how they look after the first coat. It’s a bit too light, so I let it dry (acrylic takes a minute or two to dry) and add another coat of the dark blue over the top.
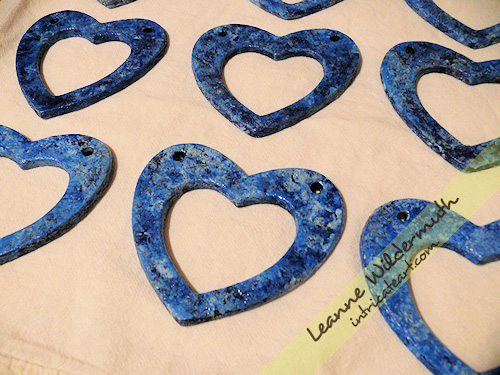
    dough ornaments how to recipe by Leanne Wildermuth
    Once I finished blotting them and allowed the paint to dry, I went over the ornaments with a coat of Mod Podge to give it a really glossy lustre. This seals the dough and helps it last longer, too!
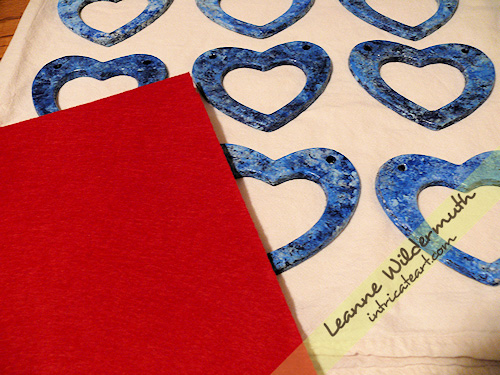
    dough ornaments how to recipe by Leanne Wildermuth
    Next, I get the self-adhesive felt out. (I found mine at Hobby Lobby in the crafting area with all the felting tools.) I wish I had found this stuff years ago!! It made the whole process wonderful and opens up a variety of ways that these ornaments can be made and used.
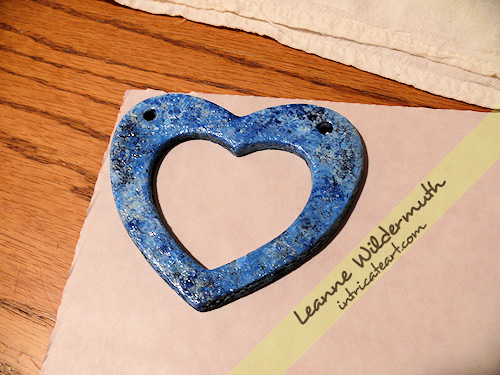
    dough ornaments how to recipe by Leanne Wildermuth
    Flip the felt over, and trace the outside of your ornament and mark the holes. Just do one at a time, because they do tend to all come out different based on how they cook, if they’re slightly misshapen in the transfer to the cookie sheet, etc.
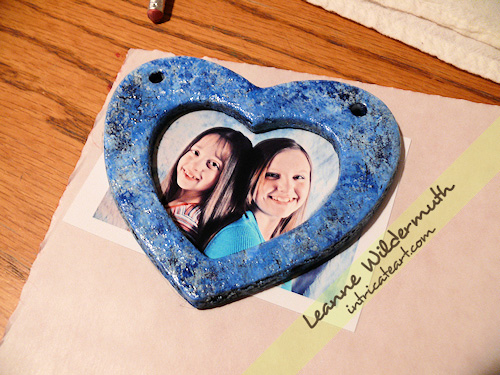
    dough ornaments how to recipe by Leanne Wildermuth
    I’ve printed the girls photos and sized them so that they’ll fit perfectly inside my little “window”. I set the photo under the opening and trace the opening onto the photo, then cut around it giving about 1/4″ overlap.
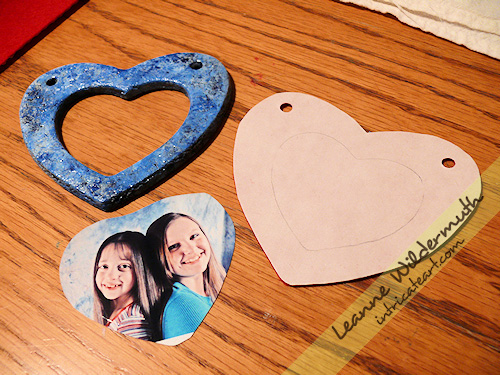
    dough ornaments how to recipe by Leanne Wildermuth
    I cut out the felt, used a hole-puncher for the holes, and have everything ready to assemble the ornament.
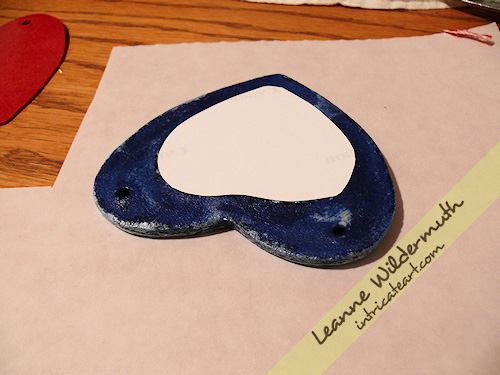
    dough ornaments how to recipe by Leanne Wildermuth
    Flip the ornament over, and align the photo to the backside, lifting to make sure it’s in position. Then just peel and stick your felt to the back, carefully lining it up to get it into position before pressing it down firmly onto the ornament.
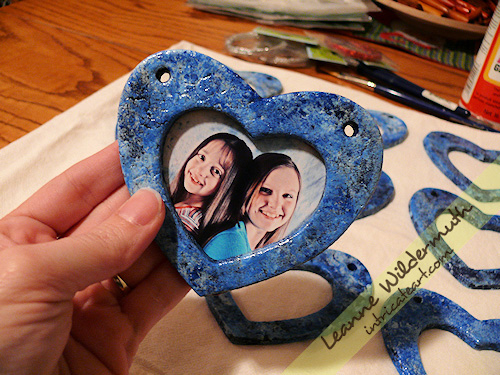
    photo dough ornament by Leanne Wildermuth
    Here’s the front side of the ornament.
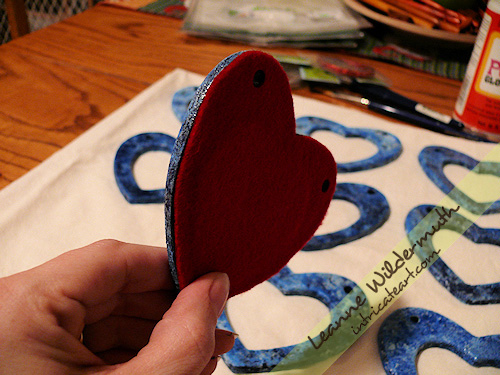
    photo dough ornaments by Leanne Wildermuth

    Here’s the backside, felted.

    photo dough ornaments by Leanne Wildermuth

    Now I just take my wire (or ribbon, or hook, whatever you’re going to use) and wind it through the holes and around itself. I like to date my ornaments, this year I dated the back for everyone else and designed the front date of ours using a silver metallic sharpie, outlining in a black sharpie. Colored sharpies work GREAT for designing and decorating the fronts of these dough ornaments!
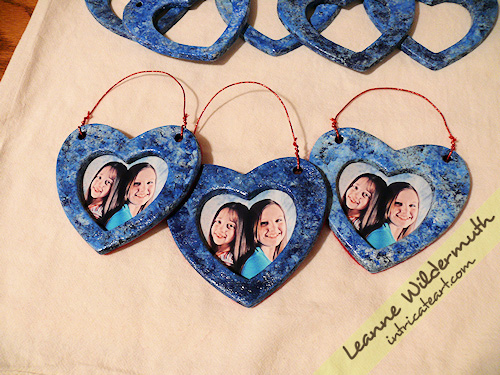
    photo dough ornaments by Leanne Wildermuth
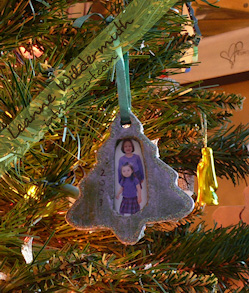
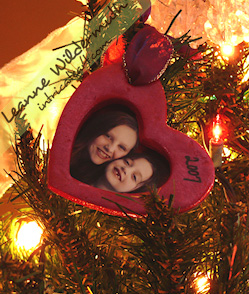
    Here are a few of them all assembled, aren’t they sweet? Once they’re all done, I slip mine into a sandwich baggie do they don’t get scratched or damaged. I store years worth of these in a heart shaped container, each individually wrapped, and they all still look wonderful!


    2001orn 2002orn
    2003orn 2005orn
    2006orn 2007orn
    dough ornaments how to recipe by Leanne Wildermuth
    Merry Christmas, everyone!!

    Get the latest updates – Subscribe by Email!

    Cranberry Cheese Bars

    November
    24
    2008

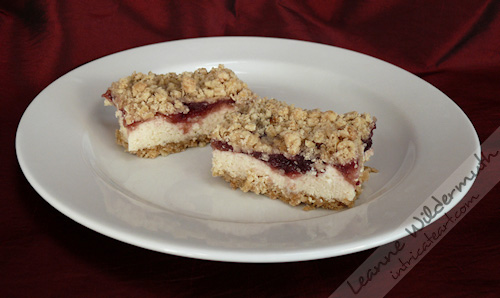
    cranberry cheese bars photo by Leanne Wildermuth

    (mostly fat free.)

    2 c. unsifted flour
    1 1/2 c. oats
    3/4 c. firmly packed brown sugar
    1 tbsp. brown sugar (for cranberry mixture)
    1 c. butter (softened to room temp)
    1 – 8oz. pkg fat free cream cheese, softened
    1 – 14oz. can fat free sweetened condensed milk
    1/4 c. Lemon Juice (from concentrate)
    2 tbsp. cornstarch
    1 – 16 oz. can whole berry cranberry sauce

    Preheat oven to 350.

    In large bowl, combine flour, oats, 3/4 c. sugar and butter – mix until crumbly.

    Reserve 1-1/2 c. crumb mixture for topping.

    Press remaining crumb mixture firmly on bottom of greased (cooking spray) 13×9 inch baking pan. Bake 15 minutes.

    Meanwhile, in a small bowl, beat cream cheese until fluffy. Beat in sweetened condensed milk until smooth; stir in lemon juice.

    In another small bowl, combine 1 tbsp. brown sugar and cornstarch. Stir in cranberry sauce. Mix well.

    Spread cheese mixture evenly over crust. Spread Cranberry mixture over the cheese layer, and sprinkle remaining crumb mixture on top. Bake 40-50 minutes or until golden. Cool, chill. Best served chilled.

    Nummy Breakfast

    March
    12
    2008

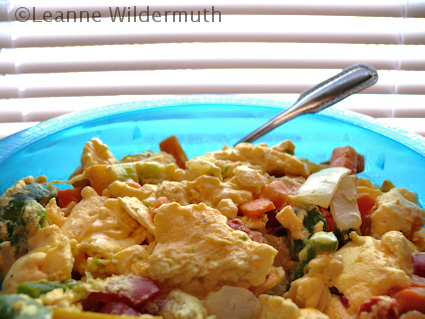
    eggbeaters pictsweet steamer veggies cheese breakfast healthy food

    I made this yesterday morning and it’s good enough to have again today, and share, too. Here are the ingredients:

    3/4 c. Eggbeaters
    1 bag Pictsweet Deluxe Steamer Veggies – Spring vegetables with asparagus
    1 lg. pinch reduced fat mexican blend shredded cheese

    Directions:

    Start the veggies steaming in the microwave for 5 minutes. When about 2 minutes remain, spray a non-stick pan with (olive oil) cooking spray and start scrambling 3/4 c. eggbeaters. Once the veggies are ready, cut a tiny hole in the bag and drain the juices. When it’s drained, open up the bag and dump it into the eggbeaters, finish cooking it together. When it’s just about finished, add a pinch of shredded cheese and mix it up.

    I’m all about an easy & fast breakfast.

    Here’s the nutrition info:

    Calories: 290
    Fat: 5g
    Carbs: 23.5g
    Protein: 25g

    Seriously – it couldn’t be better, ore more filling! I also had a half turkey sandwich with grapes for lunch, and 8 oz. of chicken breast with about 2 cups of broccoli and broccoflower for dinner – and dropped 1.10 lbs. just yesterday. I even splurged with a bit of fat free blue bunny frozen yogurt, too. I’m being much more strict again – this winter has been horrible on my hips. It’s time to put down the brownies and turn off the oven! (At least for today. And maybe tomorrow, too – but I make no promises once the PMS monster hits.)

    The Christmas Rush

    December
    22
    2007

    You’d think that with all the running around and the recent worries and stresses in my life would help keep those Christmas Cookies from hanging on to my hips? Absolutely not. Lard is lard, I suppose. Listed in the sweetest of recipe ingredients or on my rear, it seems to have it’s ultimate destination ingrained in the tiniest of lardlike molecules. :grumbles:

    I have my post-holiday work cut out for me then, as I have just 21 days after Christmas (that’s 21 birthday gift shopping days to you, friends) to get back with “the program”, which is basically reaquainting myself with those single serving meals and packing away my cookie sheets for next year. My goal is to hit my comfortable weight by my birthday, smack in the middle of January. Wish me luck. And quit sending me Harry & David!

    Today, I make my annual dough ornaments. I gave the recipe a couple of years ago but here it is again, for those of you who are :cough: bored today and want something creative and fun to do!

    DOUGH ORNAMENTS
    2 cups flour
    1 cup salt
    1 cup water

    Knead, add more flour to make it really doughy if needed, sprinkle water to make it more pliable as needed. Roll on very lightly floured surface, cut shapes using regular cookie cutters of your choice, bake at 250 for 2 hours.

    Handy & Creative Tips:
    – Roll them out on the backside of a non-stick cookie sheet so they don’t need to be transferred to the sheet.
    – Fill in any cracks with water, smooth with your finger.
    – Use a straw to punch out holes for ribbon before you bake them.
    – Once completely cooled, paint them using metallic craft paint, or use a shimmery iridescent glaze over a solid color.
    – Glue foil to the back to reflect the lights on the tree
    – Use glitter sparingly to make them shiny
    – String with ribbon and hang them on the tree!

    Other things I have to share today before I forget:

    • This plugin. This plugin is called the “One Click Plugin Updater”. Once installed and activated, and provided you’re using the most recent version of WordPress – all you need to do is visit your plugins page every now and again and scroll to see which plugins need to be updated, click to “update automatically” and that’s IT. How much easier could it get? There are a few plugins, unfortunately, that aren’t loaded into the plugins directory in such a way that they update automatically. Those need to be updated manually (and you’ll know, because the “update automatically” prompt will not go away). Other than those – it is a sweet little plugin and it will make your blogging life just a little bit easier!
    • I am still decorating my tree here on my blog. Just a couple of ornaments left! Eek!
    • Christmas cards have been sent. Do let me know if you get yours by Christmas – so I know how much earlier I need to get my butt in gear next year! If I don’t know you well, just keep hanging around and I’ll nudge you next year for your address.
    • Mom is home from the hospital! She is happy to be home. She’s still having some blips but I’m told that it’s a side-effect from her meds, so once she is off of them she should be back to her snarky old self – only able to breathe and not have any more chest pain. Yay!
    • Catybug (my little stage queen) was asked to do a reading at Church this Sunday. I found her the most beautiful (and stylish) dress and she is so excited – she gets to read the whole story of Jesus’ birth. My favorite Christmas carol, O Holy Night, will be played on piano while she tells the story. I cannot wait, it is going to be so beautiful! Send kleenex. Love, A Proud Momma.
    • I got a new phone! Whoot! I know. I’m retarded to be excited about a phone. But wait! Let me explain! I’ve had a prepaid Verizon phone for years, just before Mark left for Iraq. While mom was in the hospital though, I blew through well over a month’s worth of a regular plan fee. THAT is retarded. When I found out that “In” minutes are free, and that most of the people I talk to are on Verizon, then I just outright had a “duh” moment. I signed up for a plan online, got a free phone, free activation and now I’m blowing cash to be all cool with my ringtones. Yes, I downloaded O Holy Night! :PHere are my first four downloads:
      – 1234 (TV Version)
      – O Holy Night (Martina McBride)
      – My Stupid Mouth (John Mayer)
      – How Great is our God (Chris Tomlin) – they have this titled wrong, took me forever to find it!

      My only change would be John Mayer’s song – the lyrics that play when the phone rings should be “My stupid mouth, got me in trouble- I said too much again…”, but what plays is “I’m never speakin up again, it only hurts me”, and my choice would be WAY funnier for a ring tone.

    There’s my random blabbering for the day, I do hope you enjoy it – now I must go make some orny-mants before Christmas has passed and/or I don’t know what day it is. (I thought yesterday was Thursday. All day. And I missed a family gathering. Love, Retarded Girl.)

    I hope your Christmas preparations are going well?


    Get in the Christmas Spirit!
    Now Playing : Oh Holy Night

    [audio:ohholynight.mp3]

    Nog’alicious Cookies

    December
    16
    2007

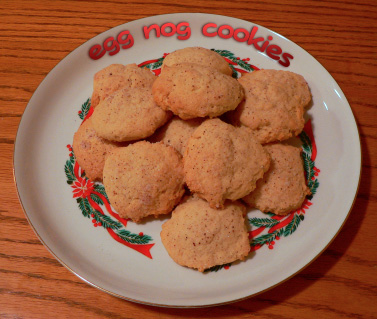
    This is the fourth year these cookies have been requested at my house. This year I’ve made a few little tweaks to the recipe. If you’re looking for a really easy and REALLY tasty Christmas Cookie that will quickly become a family favorite, these are it! Even one of my very good friends – who doesn’t like egg nog – loves these cookies.

    egg nog eggnog Christmas cookie cookies recipe

    **Modifications made in 2007 – see previous years for original recipe**

    1 c. butter softened to room temp.
    1 c. sugar
    1/2 tsp. nutmeg
    1/2 tsp. cinnamon
    1 c. **Southern Comfort Vanilla Spice** Egg Nog
    1 tsp. baking soda
    3-3/4 c. flour

    Beat butter & sugar until it’s creamy.
    Add spices, Eggnog & baking soda to butter & sugar, blend well.
    Add flour 2 cups at a time, mix (with mixer) until combined.
    Spoon onto nonstick cookie sheet, dip a cup in sugar (holiday colored sugar, sugar/cinnamon, sugar/nutmeg, your call), smoosh the dough a little – don’t flatten them.

    Bake at 375 for right around 11 minutes, when you can see the bottom edges are just gold and the tops are still creamy off-white. Do not overbake. Let cool on the cookie sheet, transfer to an airtight container to keep them soft.

    (Previously posted December 14, 2004 and November 15, 2005 and December 6, 2006.)

    Egg Nog (Eggnog) Cookies

    December
    6
    2006

    If you like eggnog (even if you don’t), and you’ve never had these cookies, make them. You’ll love them – trust me! They’re my personal favorites – and I promise to get a nicer photo of them this year. 🙂

    egg nog eggnog cookie cookies recipe
    (new pic, as promised!)

    1 c. butter softened to room temp.
    1 c. sugar
    1/2 tsp. nutmeg/cinnamon or 1/4 tsp each
    1 c. eggnog!
    1 tsp. baking soda
    4 c. flour

    Beat butter & sugar until it’s creamy.
    Add spices, Eggnog & baking soda to butter & sugar, blend well.
    Add flour 2 cups at a time, mix (with mixer) until combined.
    Spoon onto nonstick cookie sheet, dip a cup in sugar (holiday colored sugar, sugar/cinnamon, sugar/nutmeg, your call), smoosh the dough a little – don’t flatten them.
    Bake at 375 for right around 11 minutes, when you can see the bottom edges are golden brown.

    (Previously posted December 14, 2004 and November 15, 2005.)

    MmmMMm Good!

    March
    10
    2006

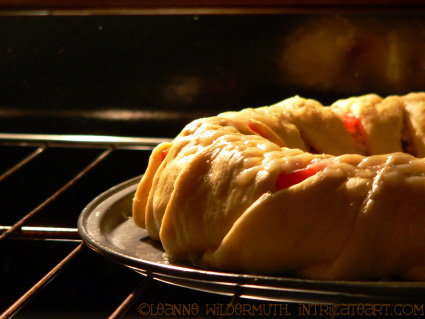
    Chicken Club Brunch Ring

    • 1/2 c. fat free mayo
    • 1 tbsp minced fresh parsley
    • 2 tsp honey dijon mustard
    • 1-1/2 tsp finely chopped onion
    • 1-3/4 c. cubed cooked chicken breast
    • 2 bacon strips, cooked & crumbled (optional)
    • 1 c. reduced-fat shredded swiss cheese
    • 2 tubes reduced-fat crescent rolls
    • 2 plum tomatoes
    • 2 c. shredded lettuce

    Keep reading »

    {Latest Projects}