Please visit my new, improved website!

>> Wildermuth Creative Portraits <<

  • Helpful How-To’s, From Experience!

    How To Make Photo Dough Ornaments

    December
    23
    2008

    dough ornaments how to recipe by Leanne Wildermuth
    Every year (since 2001), I’ve made these beautiful dough ornaments for our Christmas tree. This year I want to share with you my whole process, in case you’d like a crafty project or gift idea. It really is an any occasion craft, you can use different shapes, cutouts, themes and decorations to make it suit whatever you have going on. It’s a wonderful and sweet handmade gift!

    The first part of the project (which I failed to take photos of) involves the dough ornament itself. First, you’ll need to pick out your shape. I have nested heart cookie cutters, so I chose the biggest one, and the second to smallest so that I have enough room for the girls photo. (I take the girls Christmas photos myself in my studio the day before.) Here’s my ornament shape:
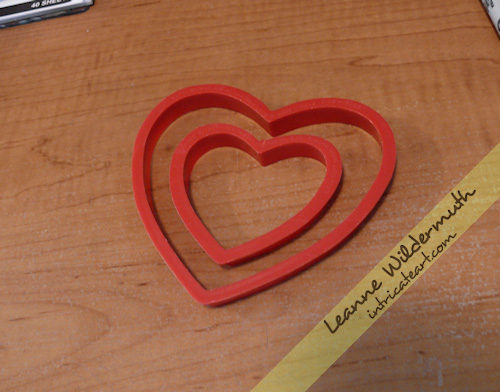
    heart shaped cookie cutter
    The next task is making the dough – which is super easy. In a large bowl, combine 2 cups flour, 1 cup salt – and then add in 1 cup of water as you’re kneading the dough. This will make enough dough for about 10 of my ornaments, but I double the batch so the girls can make their own ornaments each year, too. Knead the dough really well, so it’s pliable and easy to manage.

    Whatever surface you’re working on, you want to be able to get your dough up easily. Use a flexible cutting board, or wax paper to lift it off the table and peel back away from the back of the ornament. Put a little flour out on the surface and roll your dough to about 1/4″ thickness. If it’s cracking, you can dust some flour on it and then spray with a mist of water from a spray bottle, smoothing over with your hand.

    Create your shapes using your cutter, and transfer them to an ungreased cookie sheet. To make holes for ribbons or hanging wire, just pop a hole into the shape using a straw, not too close to the edge so the dough doesn’t crack or break over time.

    Before you bake them, use a toothpick to go around the edges and clean off any jagged dough edges. Once these dry, they take a bit of work to file off – so do as much beforehand as you can.

    Bake your ornaments at 200 degrees for 2 hours. When they’re done, let them cool to the touch. Then, if you need to, use a nail file/buffer to clean off any jagged pieces from around the edges.

    Now, you can prep your creative surface for painting! I use aluminum foil or wax paper to make it easy to move them around as they’re drying.
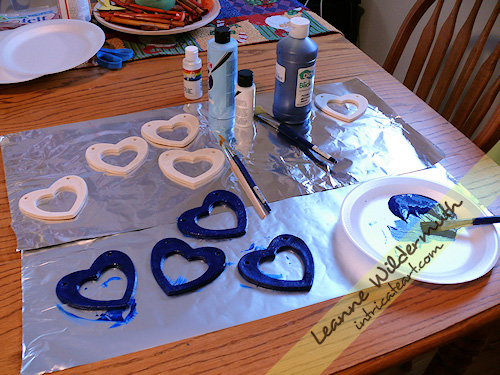
    dough ornaments how to recipe by Leanne Wildermuth
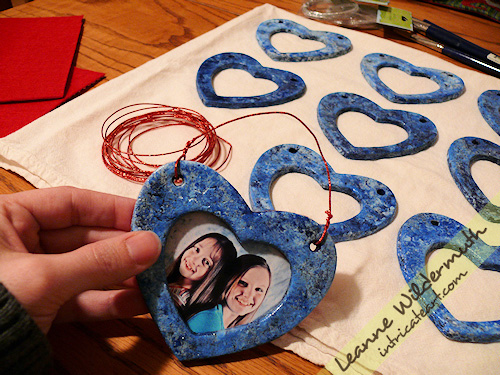
    I’ve got my base color, dark blue, on a few of my ornaments already. The design is different each year, and usually I know how I’m going to paint them and have all of my materials/paints/backing/wire purchased before I start my project. Since my photo backdrop is a mottled blue, I decided to follow it through to the ornament. It’s also flecked with red, so I chose a red self-adhesive felt backing paper and red decorative wire.
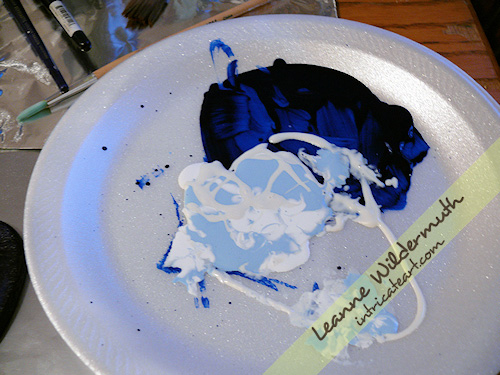
    dough ornaments how to recipe by Leanne Wildermuth
    Here’s my palette. I’ve got the dark blue drying, and I’m going to “sponge” on a light blue, white and pearly glaze. These are all acrylic paints you can pick up at Hobby Lobby for a couple of bucks. You really don’t need much, the small bottles are perfect. I put the paint on top of the other in a crazy pattern so it transfers to the ornament randomly. I paint through the holes and around to the back a little bit, just in case any edging shows through.

    Prepare to get messy! I just wadded up a paper towel for this part, just dab it onto the plate and then onto the ornaments.
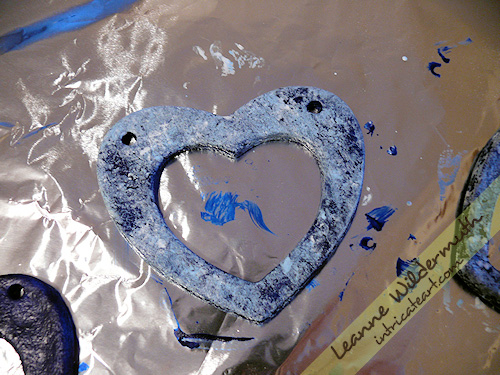
    dough ornaments how to recipe by Leanne Wildermuth
    Here’s how they look after the first coat. It’s a bit too light, so I let it dry (acrylic takes a minute or two to dry) and add another coat of the dark blue over the top.
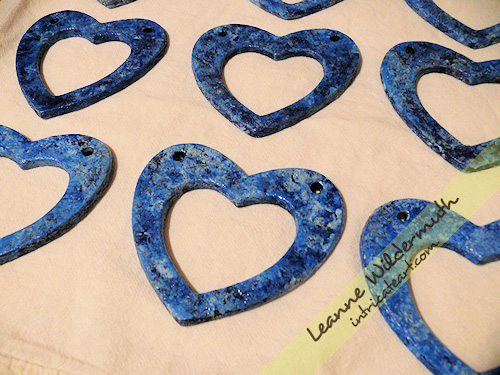
    dough ornaments how to recipe by Leanne Wildermuth
    Once I finished blotting them and allowed the paint to dry, I went over the ornaments with a coat of Mod Podge to give it a really glossy lustre. This seals the dough and helps it last longer, too!
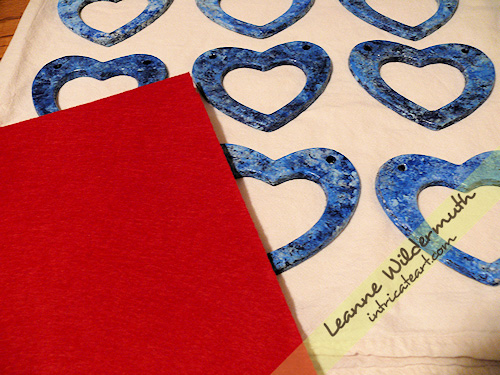
    dough ornaments how to recipe by Leanne Wildermuth
    Next, I get the self-adhesive felt out. (I found mine at Hobby Lobby in the crafting area with all the felting tools.) I wish I had found this stuff years ago!! It made the whole process wonderful and opens up a variety of ways that these ornaments can be made and used.
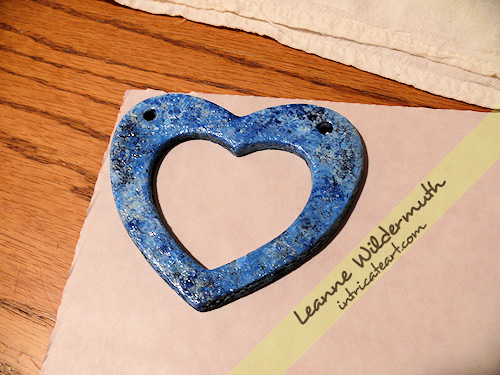
    dough ornaments how to recipe by Leanne Wildermuth
    Flip the felt over, and trace the outside of your ornament and mark the holes. Just do one at a time, because they do tend to all come out different based on how they cook, if they’re slightly misshapen in the transfer to the cookie sheet, etc.
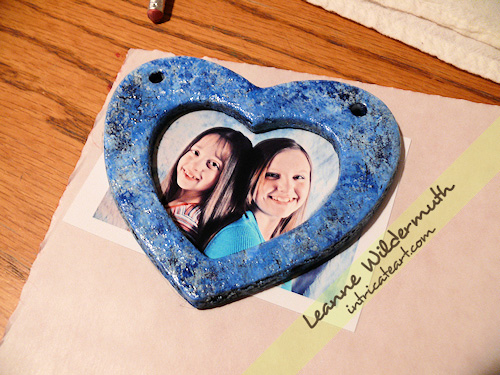
    dough ornaments how to recipe by Leanne Wildermuth
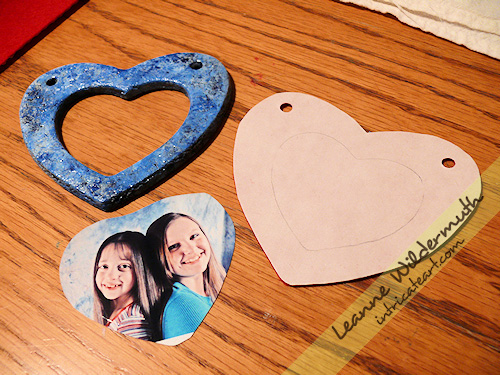
    I’ve printed the girls photos and sized them so that they’ll fit perfectly inside my little “window”. I set the photo under the opening and trace the opening onto the photo, then cut around it giving about 1/4″ overlap.
    dough ornaments how to recipe by Leanne Wildermuth
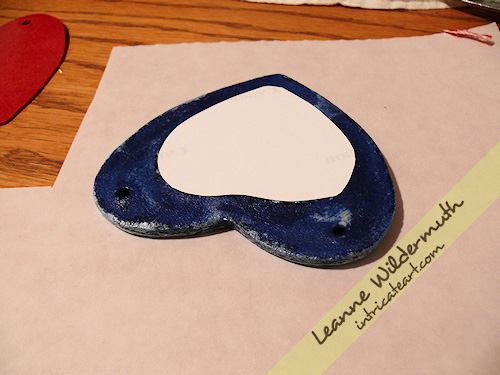
    I cut out the felt, used a hole-puncher for the holes, and have everything ready to assemble the ornament.
    dough ornaments how to recipe by Leanne Wildermuth
    Flip the ornament over, and align the photo to the backside, lifting to make sure it’s in position. Then just peel and stick your felt to the back, carefully lining it up to get it into position before pressing it down firmly onto the ornament.
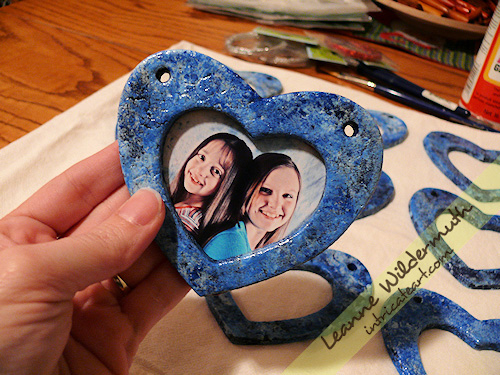
    photo dough ornament by Leanne Wildermuth
    Here’s the front side of the ornament.
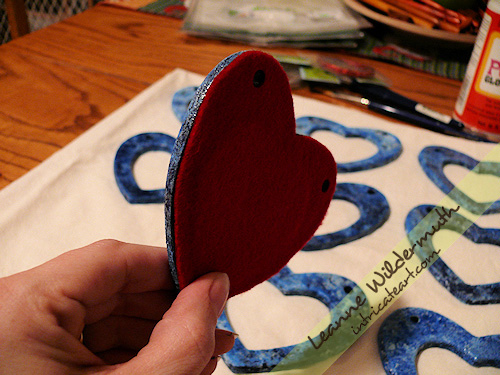
    photo dough ornaments by Leanne Wildermuth

    Here’s the backside, felted.

    photo dough ornaments by Leanne Wildermuth

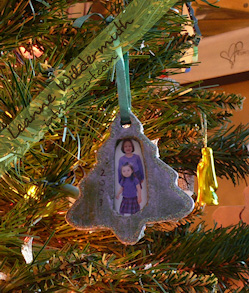
    Now I just take my wire (or ribbon, or hook, whatever you’re going to use) and wind it through the holes and around itself. I like to date my ornaments, this year I dated the back for everyone else and designed the front date of ours using a silver metallic sharpie, outlining in a black sharpie. Colored sharpies work GREAT for designing and decorating the fronts of these dough ornaments!
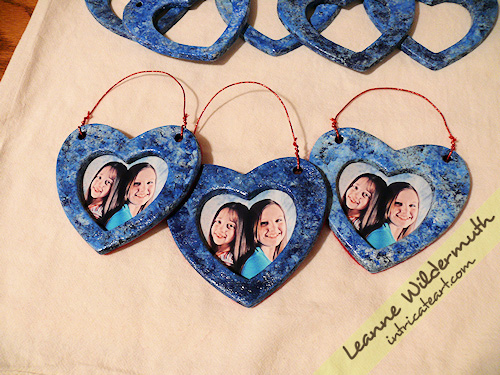
    photo dough ornaments by Leanne Wildermuth
    Here are a few of them all assembled, aren’t they sweet? Once they’re all done, I slip mine into a sandwich baggie do they don’t get scratched or damaged. I store years worth of these in a heart shaped container, each individually wrapped, and they all still look wonderful!

    2001orn 2002orn
    2003orn 2005orn
    2006orn 2007orn
    dough ornaments how to recipe by Leanne Wildermuth
    Merry Christmas, everyone!!

    Get the latest updates – Subscribe by Email!

    Have the Last Word.

    April
    12
    2008

    I’ve recently modified my message that displays after a guest leaves their first comment on my blog. I’ve received a few rude comments that leave me scratching my head, wondering how on earth you’d leave a snarky/rude/hurtful/hateful comment on the internet. I mean really, why wouldn’t you just click the little “X” in the top right corner of your browser window? Why do people find that being deliberately rude is such an impossible urge to ignore?

    A few months ago, after receiving a slanderous comment about one of my clients on my blog, I decided to moderate all first time commentors. Since then, I’ve felt an added level of security – those people won’t even get one second of air time on my blog. Those people? They suck.

    So here’s the message, revised:

    Your first comment has gone into moderation.

    I’ll release your comment very soon, if you’re a real person.
    (and you should also be KIND, and drama free.)
    (oh and funny would be GREAT. I love funny.)
    Please come again!
    🙂

    Please note: If you’ve used every smiley I own just for fun, or said something rude, unkind or thoughtless that is going to serve no other purpose than to insult or hurt someone you don’t even know, I’ll save you the embarrassment and delete your comment before it ever hits the world wide web. I know you don’t want EVERYONE on the internet to know you don’t think before you hit that “submit” button!

    You can thank me later. 😉

    Now in WordPress, you can customize your own message in your themes comments.php file. Just look for this line of code:

    < ?php if ($comment->comment_approved == '0') : ?>

    Beneath it there should be some text that says “your comment is in moderation” or something plain. Spruce it up. Personalize it with your own message.

    Be sure that your text ends just above the < ?php endif; ?>.

    It doesn’t take too much effort to set your blog to moderate – go into your “discussion” options and set “author must have previously approved comment.” – and that’s it. Once you approve someone, you don’t have to do it again.

    And you, my friend, get to have the last word with that jerk that doesn’t know when to click the little “X”. Totally worth it.

    Got Spam in YOUR Templates?

    March
    8
    2008

    This is not the first time I’ve seen this – spammers somehow hack into WordPress template files and add in their junk, styling it inline so it’s not visible on your blog. Hidden junk mail, basically, in your theme. It happened to me over a year ago, but this particular incident was a refresher course as I found it in a client’s header file while upgrading and updating her theme. Please, please please – check your theme template files regularly. Particularly your header.php, those buggers like to get their links in there and set up negative margins before your content begins on the page.

    Here are a couple of screenshots – click to enlarge. You can see the menu_rll is the div id used to enclose the spam. In this case, they hacked into both the header.php as well as the main index.php.

    spammers.jpg
    Found in the header.php template

    spammers2.jpg
    Found in the index.php template
    It is helpful if you change your admin password somewhat regularly, other than that I can’t tell you exactly how they manage to get in there. I’ve had a pretty secure password for years (I rotate it out) and keep my file permissions secure as well, so I’ve never been able to get a straight answer about the “how does this happen”. It’s aggravating – as these types of links should be PAID for and you should not be spammed or hacked into displaying them without your knowledge. I have tried to pursue these sites before (none of these links are live, I will not give them any free linkage here) – they always play dumb that they had no idea the people they pay to manage their links were hacking sites.

    So folks, this might be news to you – but you might just find some spammy links in your template files. Go on and check, it only takes a minute. Look under presentation/theme editor and just scroll through your template files to make sure there’s nothing spammy going on with your website that you don’t know about. And also – if you’re not using the most current version of WordPress, It’s time to upgrade.. Eliminate any possible vulnerability.

    UPDATE: Another WP user discovered massive amounts of spam in his template, it actually affected his Google ads – the ad content started getting “spammy” and he couldn’t figure out why. Check out his experience here.

    Another update: I am also being told that when upgrading – it is HIGHLY advised to completely delete everything but the wp-config file and upload the fresh upgrade to ensure any files that were hacked are gone and avoid future vulnerabilities. For detailed and easy to follow upgrade instructions, see my post here.


    Also see: TechCrunch “WordPress Security Issues Lead To Mass Hacking. Is Your Blog Next?

    How to Lose Weight the Right Way

    October
    8
    2007

    monarch butterfly photo by Leanne Wildermuth

    “How does one become a butterfly?” she asked pensively.

    “You must want to fly so much that you are willing to give up being a caterpillar.”

    ~Trina Paulus

    The quote at the meeting this week is so appropriate. Without these meetings, I might not keep things like this in mind, I would definitely not feel like I am holding myself accountable for my health and in turn – my weight.

    Keep reading »

    How To Upgrade WordPress

    September
    13
    2007

    I ran through several of my blogs yesterday and upgraded them the latest version of WordPress. (Hey, I was waiting for a client to get back to me. I had to do something.) I get asked a lot about upgrading people, and it seems the majority of folks are afraid of messing things up. I’m here to tell you – that’s hard to do. Really. If you can install a plugin, you can upgrade your blog.

    I’m giving you a step-by-step tutorial so that you can upgrade yourself. Really, there’s no reason to not be using the most current version, except that it costs money unless you’re willing to do it yourself.

    UPDATE:


    WordPress 2.7 and above has auto-upgrade built-in. If your installation requires upgrading, you will see a prompt at the top of your admin panel. Look under “Tools” and select “Upgrade”, and follow the on screen instructions.

    * * * END UPDATE * * *


    For versions previous to 2.7: There’s a plugin for this, as well. WordPress Automatic Upgrade is available here. Be sure to read through all of the instructions before use. This plugin DOES THE BACKUP FOR YOU. I recommend you proceed with “manual” steps in the plugin so that you can download the backup to your own computer. 🙂

    Without further blab, here’s how you do it (manually):

    Keep reading »

    How To Grow Grass, Fast!

    July
    6
    2007


    tips to grow grass from seed, fast
    Over the past 11 years that we’ve owned our home, we’ve made several failed attempts to fill a lot of bald spots in the yard. This year, me and my new green thumb have finally got it all figured out.

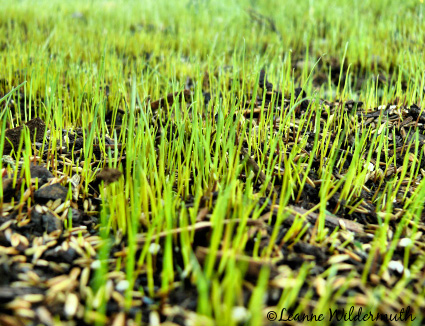
    The grass pictured above is seed that I put down Sunday, July 1st. We saw growth in just 4 days, folks. Now that’s fast. This is day 5, and it’s over an inch long. I know you’re all just dying to know my secret, right? Well just pretend you are, because I’m going to tell you anyway.

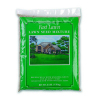
    100miraclegro.jpg100seed.jpg100miraclegro.jpg100hose.jpg
    The dirt in the bare spot needs to be raked over, just a bit – I didn’t go very deep, maybe just 1/4 or 1/2 inch. I spread a nice layer of Miracle-Gro potting soil (the moisture control is good, too) over the area – then put down some generic fast growing grass seed – unless you want the special stuff, that will probably grow quickly too, but you can always seed the good stuff in the fall. Over the grass seed, spread a nice thin layer of Miracle-Gro again, then keep it really well saturated. Water in the morning and at night, and any time you notice the Miracle-Gro has dried out.

    We had a torrential rainfall on Tuesday night that washed much of the Miracle-Grow and seed both in a pile at the end of the area that I seeded. I gently raked it, spreading it back to its original spot, and added more soil and a little more seed, then drenched it all again. It’s all filling in and I’m excited to see so many bare patches filling in with bright green grass!

    And there you have it. Now go, sow some grass. Your bare summer feet will be very happy, because baby grass is very soft, and it tickles.

    UPDATE April 19, 2009

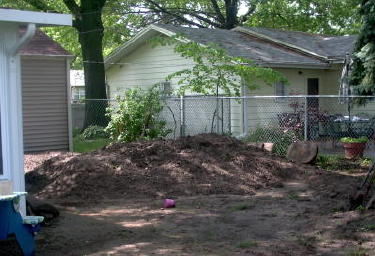
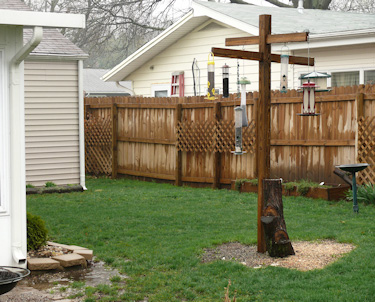
    I’d like to show you before and after photos of this area of our yard.

    BEFORE:
    mound of dirt
    AFTER:
    Note: We added a privacy fence, and neighbor cut down all of their trees,
    added a room and a door on the side of the garage.
    Taken on overcast day.

    grow grass fast landscaping Leanne Wildermuth


    The first photo was taken in 2004, just after we’d had a room addition put on the house and were left with a huge mound of dirt. We left the mound for several years and planted on it, using it as part of the landscape. In July 2007, we transplanted everything and leveled the mound, and started growing grass. The summer of 2008 it was patchy and young, still filling in. Now, April 2009, you can see it’s thick and lush and very, very green.

    Stop back and let me know how well this works for you – and share your before & after photos!

    While you’re here, grab one of my amazing photos for your desktop, or visit my shop!

    How To Leave Blogger

    April
    20
    2006

    Finally, the long awaited (and long overdue, sorry ’bout that) instruction manual has arrived! For those of you “stuck with blogger”, “sick of blogger”, and who “want a real blog”, this is all the information you need rolled up into one tidy little post. If I forget anything, I’ll update it. If you know something I don’t know, tell me, and I’ll update that, too.

    (updated 2.18.10)

    Keep reading »

    {Latest Projects}