Please visit my new, improved website!

>> Wildermuth Creative Portraits <<

  • Get creative with me!

    Portrait Giveaway Winner : Week #1

    January
    3
    2009

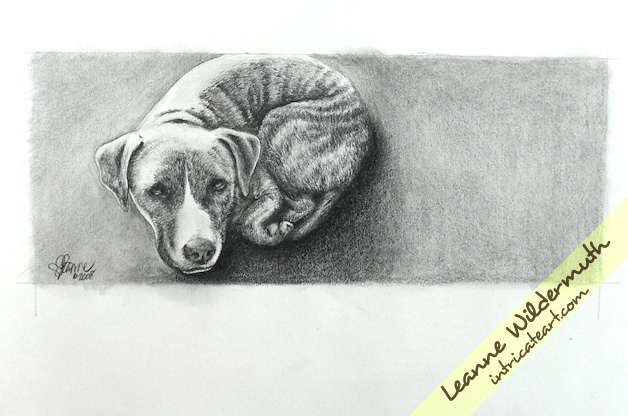
    bailey foster family rescue dog
    After a few hours of going through all of the photos and submissions for my first custom portrait giveaway for 2009, I’ve selected Michelle’s submission of Bailey as the winner. Here’s her story:

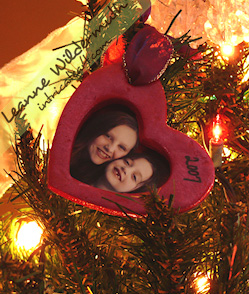
    We’re what they call a “foster-failure”. My sister is director for a no-kill shelter and asked us to foster a puppy for a week. Bailey was on death-row at another shelter before my sister’s agency rescued her. After one week with us, she stole our hearts, as well as just about everything that’s not nailed down. Bailey’s first week with us she discovered toys, stuffed animals, boots, and bathroom rugs. Everything was “hers” and she’d drag her haul underneath the dining room table. My 12 year old daughter would say “Mom, she’s jacking my Build-A-Bear again!!”, which just happens to be her all-time favorite thing to steal (pictured in the above photo). Every time I’d see her dragging my husband’s work boot under the table to add to her ever-growing stash, I’d say “and this is MINE…and this is MINE”. We’re all conditioned now to looking under the dining room table for whatever it is we’re missing.”

    I did have four finalists, so you guys did an amazing job in the inspiration department this week! It was really tough to narrow it down to just one. In some cases, I found the photo itself inspiring – others, the story – in this case, both melded together perfectly and tugged at my heartstrings!

    Congrats to Michelle!

    Get the latest updates – Subscribe by Email!
    Don’t want to wait? Commission your own 5×7 graphite custom portrait
    for just $70.00 right here in my shop!

    (Checkout using PayPal)

    Graphite Portrait Giveaway : Week #1

    December
    29
    2008

    I’ve added a new feature to my blog for 2009 — a weekly graphite portrait giveaway! Each week, one winner will receive one 5×7 graphite drawing from their photograph.
    Each Monday, I will post the weekly Call for Entries along with the previous weeks completed portrait. I may change the subject theme each week, or leave the theme open, so please pay close attention to the details in each announcement.

    Entries will be accepted through Friday afternoon, at which time I will close comments and select one winner from the entries received. I will post the completed portrait with the following week’s Giveaway announcement.

    Qualified entries will include a valid e-mail address, and the comment should include one link to a photograph owned/taken by the entrant. If you do not have a place to upload photos to link one, you can e-mail it to gallery *at* intricateart dot-com.

    If your entry is not chosen, you may enter again. I encourage you to include a short story with your entry.

    WEEK 1 : CALL FOR ENTRIES
    Theme

        : Open – Single subject (person, pet, place or thing)

    Deadline

        : Friday, January 2, 2009

    To Enter

        : Leave a comment, include a link to your photo.

    Note: *G* Rating only

    Your challenge? To inspire me! Choose your photo wisely – I will select a winner based on how the photo and/or story moves me.

    Don’t want to wait? Commission your own 5×7 custom drawing for just $70.00 right here in my shop! (Checkout using PayPal!)

    Good luck!!

    Get the latest updates – Subscribe by Email!

    How To Make Photo Dough Ornaments

    December
    23
    2008

    dough ornaments how to recipe by Leanne Wildermuth
    Every year (since 2001), I’ve made these beautiful dough ornaments for our Christmas tree. This year I want to share with you my whole process, in case you’d like a crafty project or gift idea. It really is an any occasion craft, you can use different shapes, cutouts, themes and decorations to make it suit whatever you have going on. It’s a wonderful and sweet handmade gift!

    The first part of the project (which I failed to take photos of) involves the dough ornament itself. First, you’ll need to pick out your shape. I have nested heart cookie cutters, so I chose the biggest one, and the second to smallest so that I have enough room for the girls photo. (I take the girls Christmas photos myself in my studio the day before.) Here’s my ornament shape:
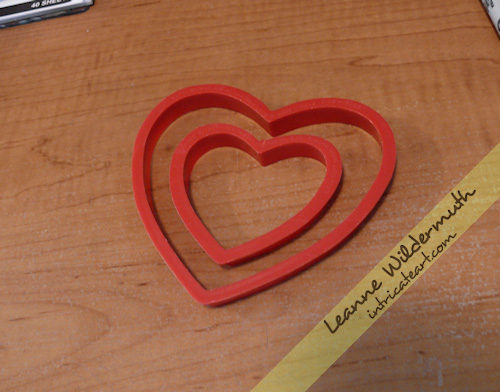
    heart shaped cookie cutter
    The next task is making the dough – which is super easy. In a large bowl, combine 2 cups flour, 1 cup salt – and then add in 1 cup of water as you’re kneading the dough. This will make enough dough for about 10 of my ornaments, but I double the batch so the girls can make their own ornaments each year, too. Knead the dough really well, so it’s pliable and easy to manage.

    Whatever surface you’re working on, you want to be able to get your dough up easily. Use a flexible cutting board, or wax paper to lift it off the table and peel back away from the back of the ornament. Put a little flour out on the surface and roll your dough to about 1/4″ thickness. If it’s cracking, you can dust some flour on it and then spray with a mist of water from a spray bottle, smoothing over with your hand.

    Create your shapes using your cutter, and transfer them to an ungreased cookie sheet. To make holes for ribbons or hanging wire, just pop a hole into the shape using a straw, not too close to the edge so the dough doesn’t crack or break over time.

    Before you bake them, use a toothpick to go around the edges and clean off any jagged dough edges. Once these dry, they take a bit of work to file off – so do as much beforehand as you can.

    Bake your ornaments at 200 degrees for 2 hours. When they’re done, let them cool to the touch. Then, if you need to, use a nail file/buffer to clean off any jagged pieces from around the edges.

    Now, you can prep your creative surface for painting! I use aluminum foil or wax paper to make it easy to move them around as they’re drying.
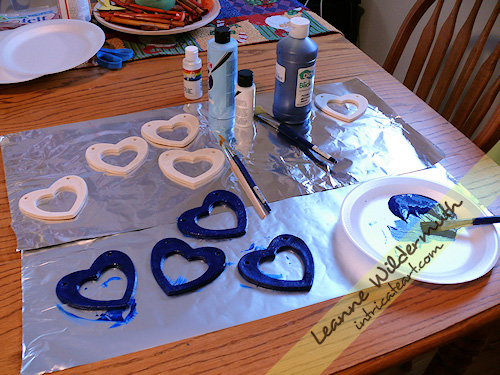
    dough ornaments how to recipe by Leanne Wildermuth
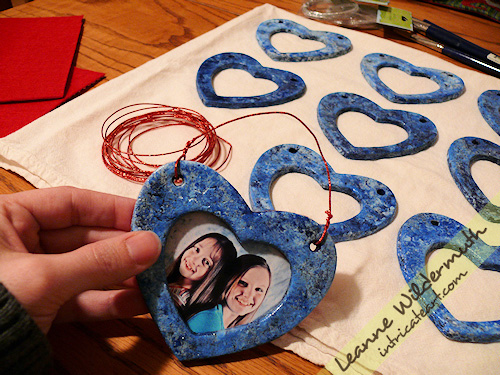
    I’ve got my base color, dark blue, on a few of my ornaments already. The design is different each year, and usually I know how I’m going to paint them and have all of my materials/paints/backing/wire purchased before I start my project. Since my photo backdrop is a mottled blue, I decided to follow it through to the ornament. It’s also flecked with red, so I chose a red self-adhesive felt backing paper and red decorative wire.
    dough ornaments how to recipe by Leanne Wildermuth
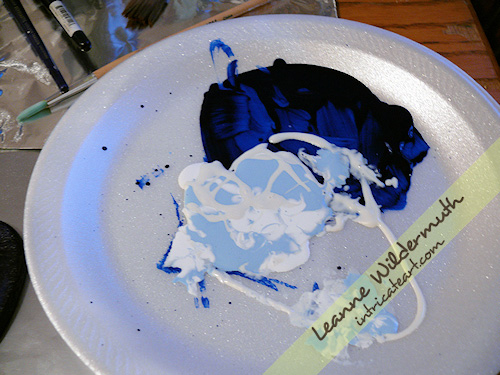
    Here’s my palette. I’ve got the dark blue drying, and I’m going to “sponge” on a light blue, white and pearly glaze. These are all acrylic paints you can pick up at Hobby Lobby for a couple of bucks. You really don’t need much, the small bottles are perfect. I put the paint on top of the other in a crazy pattern so it transfers to the ornament randomly. I paint through the holes and around to the back a little bit, just in case any edging shows through.

    Prepare to get messy! I just wadded up a paper towel for this part, just dab it onto the plate and then onto the ornaments.
    dough ornaments how to recipe by Leanne Wildermuth
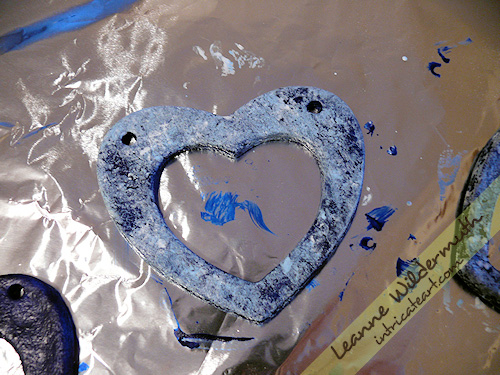
    Here’s how they look after the first coat. It’s a bit too light, so I let it dry (acrylic takes a minute or two to dry) and add another coat of the dark blue over the top.
    dough ornaments how to recipe by Leanne Wildermuth
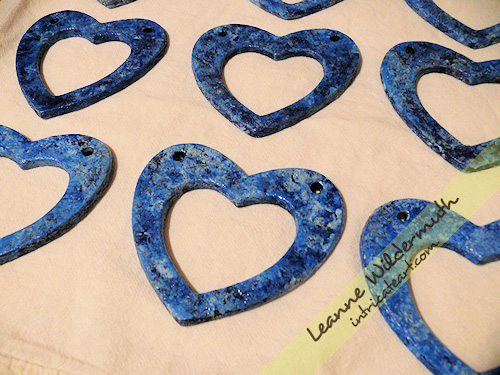
    Once I finished blotting them and allowed the paint to dry, I went over the ornaments with a coat of Mod Podge to give it a really glossy lustre. This seals the dough and helps it last longer, too!
    dough ornaments how to recipe by Leanne Wildermuth
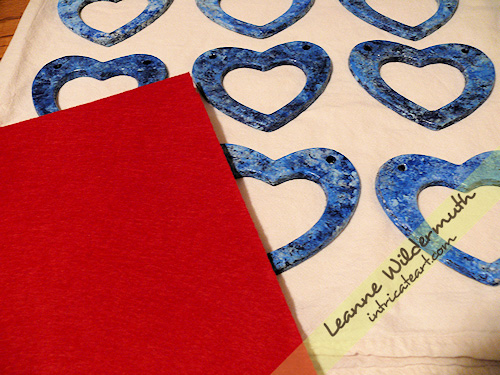
    Next, I get the self-adhesive felt out. (I found mine at Hobby Lobby in the crafting area with all the felting tools.) I wish I had found this stuff years ago!! It made the whole process wonderful and opens up a variety of ways that these ornaments can be made and used.
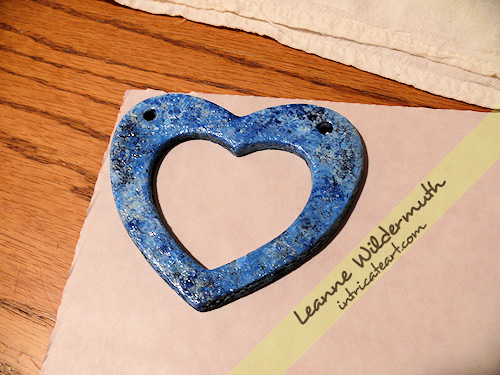
    dough ornaments how to recipe by Leanne Wildermuth
    Flip the felt over, and trace the outside of your ornament and mark the holes. Just do one at a time, because they do tend to all come out different based on how they cook, if they’re slightly misshapen in the transfer to the cookie sheet, etc.
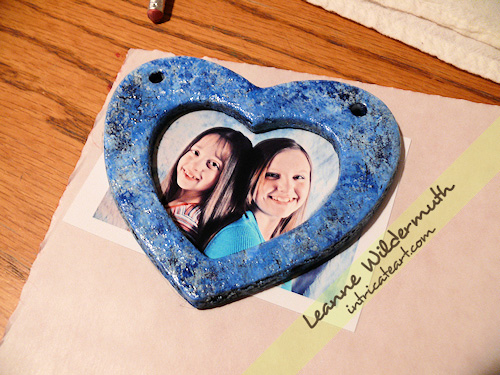
    dough ornaments how to recipe by Leanne Wildermuth
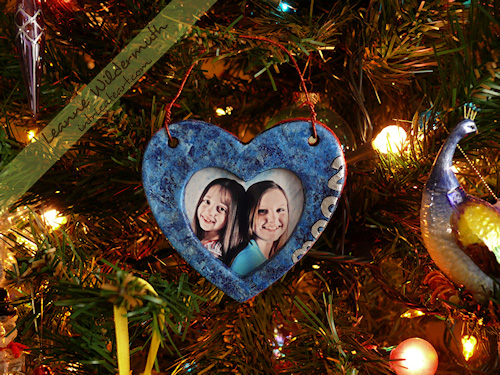
    I’ve printed the girls photos and sized them so that they’ll fit perfectly inside my little “window”. I set the photo under the opening and trace the opening onto the photo, then cut around it giving about 1/4″ overlap.
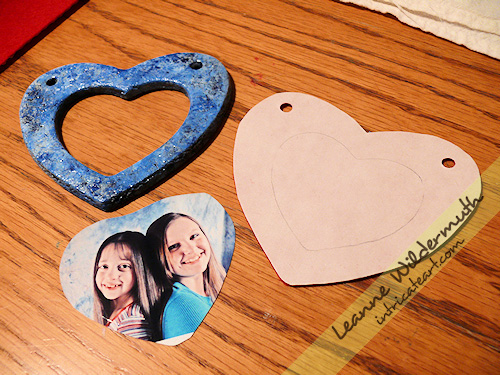
    dough ornaments how to recipe by Leanne Wildermuth
    I cut out the felt, used a hole-puncher for the holes, and have everything ready to assemble the ornament.
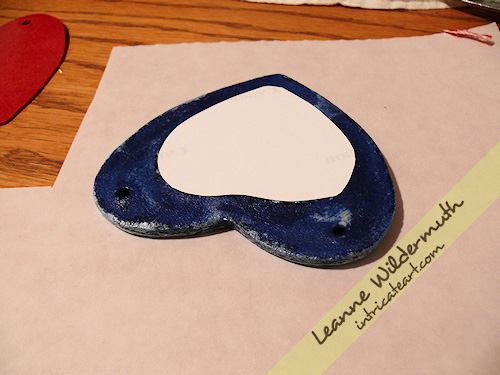
    dough ornaments how to recipe by Leanne Wildermuth
    Flip the ornament over, and align the photo to the backside, lifting to make sure it’s in position. Then just peel and stick your felt to the back, carefully lining it up to get it into position before pressing it down firmly onto the ornament.
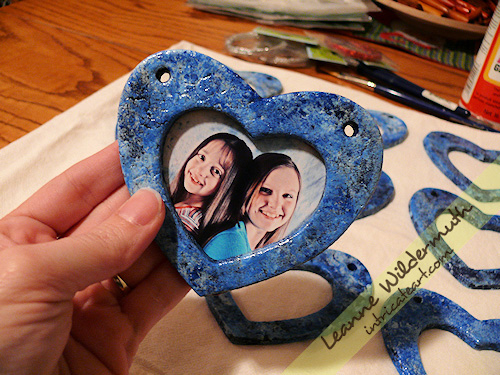
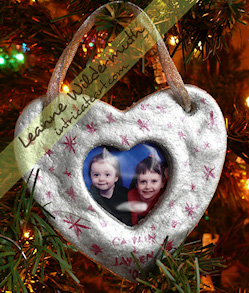
    photo dough ornament by Leanne Wildermuth
    Here’s the front side of the ornament.
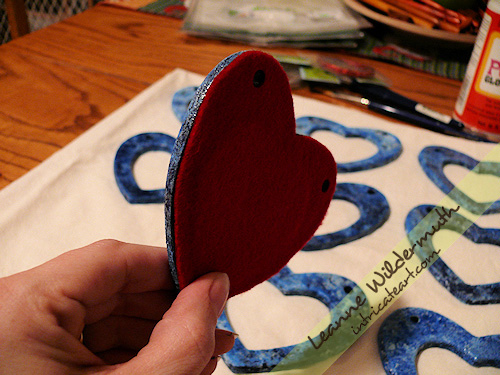
    photo dough ornaments by Leanne Wildermuth

    Here’s the backside, felted.

    photo dough ornaments by Leanne Wildermuth

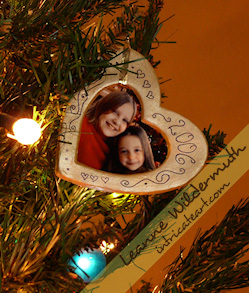
    Now I just take my wire (or ribbon, or hook, whatever you’re going to use) and wind it through the holes and around itself. I like to date my ornaments, this year I dated the back for everyone else and designed the front date of ours using a silver metallic sharpie, outlining in a black sharpie. Colored sharpies work GREAT for designing and decorating the fronts of these dough ornaments!
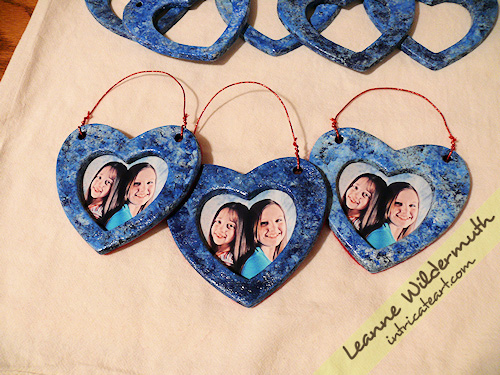
    photo dough ornaments by Leanne Wildermuth
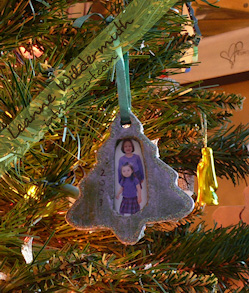
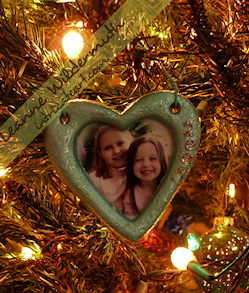
    Here are a few of them all assembled, aren’t they sweet? Once they’re all done, I slip mine into a sandwich baggie do they don’t get scratched or damaged. I store years worth of these in a heart shaped container, each individually wrapped, and they all still look wonderful!
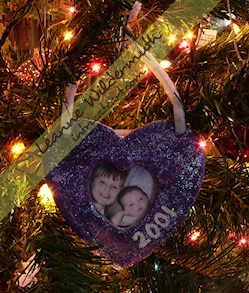
    2001orn 2002orn
    2003orn 2005orn
    2006orn 2007orn
    dough ornaments how to recipe by Leanne Wildermuth
    Merry Christmas, everyone!!

    Get the latest updates – Subscribe by Email!

    Pit Bull Portrait : Josie Completed

    December
    18
    2008

    pit bull dog portrait by leanne wildermuth

    I finished Josie’s portrait late lastnight, and my work in progress shots require much editing for lighting. I just took this daylight shot and will get it scanned for more accurate details and color – but wanted to share. Her portrait is exactly how I imagined it would be, and her loving personality is so apparent.

    My to-do list is crazy big, Martina is singing White Christmas in the family room and I have much to accomplish in a few short hours! Will post the final scan once I have another moment.

    xo

    Pit Bull Portrait : Josie WIP #1

    December
    16
    2008

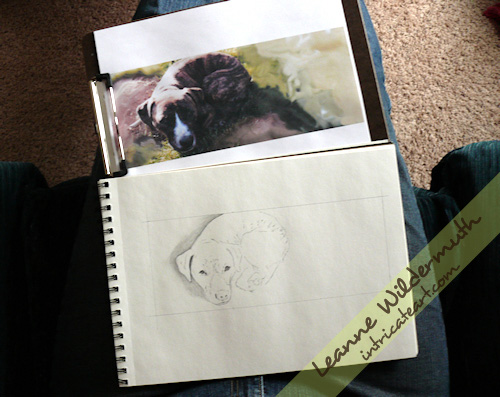
    pit bull pencil custom portrait progress
    I began working on this lovely brindle pit bull portrait this afternoon. Her name is Josie, she’s a Christmas portrait so I’ll be getting this drawing done up in the next day or so to put it with a Gift Certificate for my client – I will be painting Josie again some time in January. My client rescues pit bulls and I have to give her props for that, she has 5 dogs at the moment (Josie, sadly, has gone over the rainbow bridge).

    I am really drawn into this offset curled up pose, after looking through all of her photos I thought this best suited her personality and comfort in her surroundings.

    I’ll post all of the progress together so you can “watch” the piece as it develops.

    Mother & Daughter Portrait Complete

    December
    14
    2008

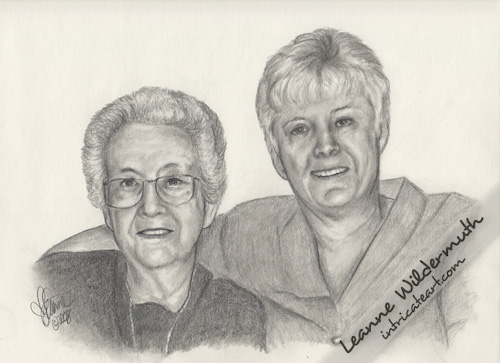
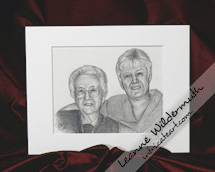
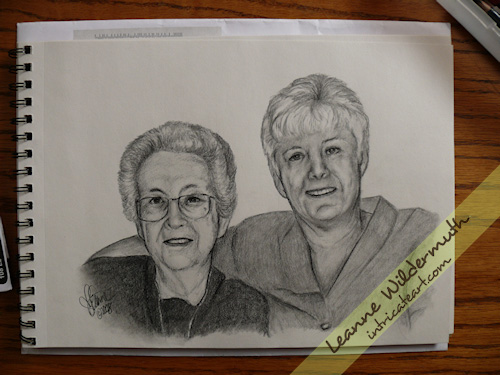
    Custom graphite pencil portrait Audrey and Janeice drawing by Leanne Wildermuth

    I’ve completed this pencil portrait of Audrey and Janeice, matted it and have it wrapped in and ready to present to Audrey today at Church. I’m not sure if all my little modifications are even noticeable to you, the eyes, a bit more blending in the skin tone and deepening, I’ve tweaked both of their noses – little things that seemed off to me as I kept looking back and forth from their photo to the drawing.

    custom graphite pencil drawing portrait mother and daughter by Leanne Wildermuth Here’s the piece matted and I’ve signed the matboard and it’s ready to drop into a frame, just in time for Christmas.
    It’s been a busy week here in the studio, I’ve tried to get away a couple of times to get some Christmas shopping done – I’m so glad I can do so much of it online! Today I’ll be getting another piece ready, I’ll be drawing a brindle Pit Bull named Josie over the next week. I’ll also put together my Handmade Gift Exchange packages (Catie joined in on the fun, and her gift is just so cute!), get a hundred or so Christmas cards and postcards addressed, and attend the girls Church Christmas Program later on in the evening.

    If you’re on Facebook – I did get the girls Piano Recital videos uploaded to my wall – go have a peek if you haven’t already, I’m so proud of them!

    I hope you’re all doing well – and that you’re getting everything in order for the Holiday without panic! It always seems there’s less and less time every year, doesn’t it?

    Graphite Portrait : Audrey & Janeice

    December
    11
    2008

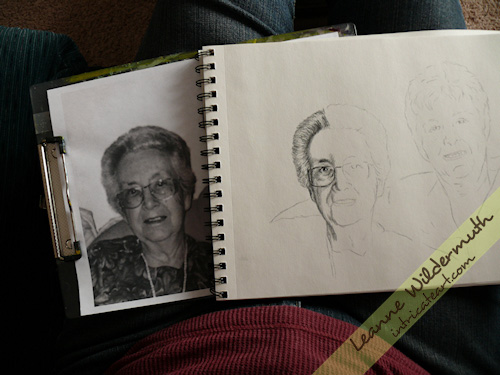
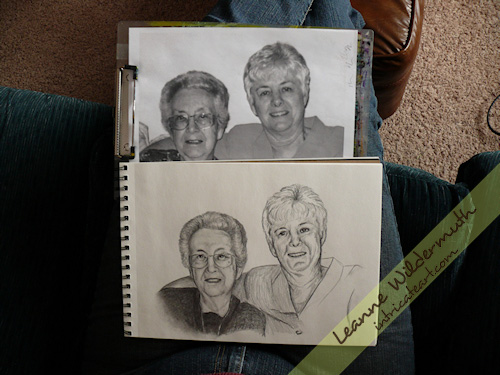
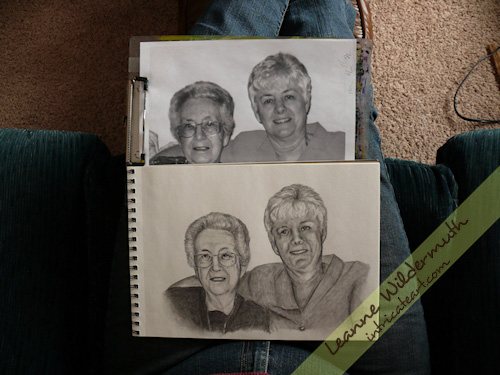
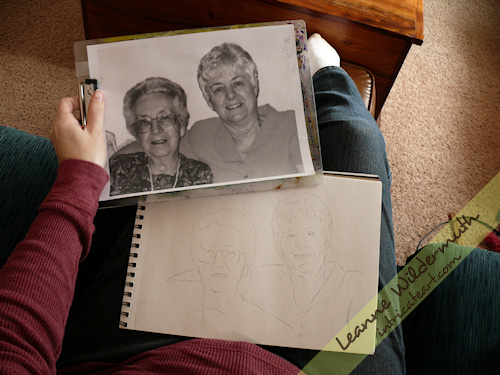
    Another graphite pencil portrait that I’ve been working on, Audrey and Janeice. I started yesterday with penciling in the facial features and general outline – it’s pretty light but you get the idea of how getting these proportions is crucial as I’m working in the shading.

    I started with Audrey, working left to right across the piece. Most of these progress shots are pretty rough, and even now I am still in my contemplating stage with the portrait since I notice things every time I look at it that need just a bit of tweaking.

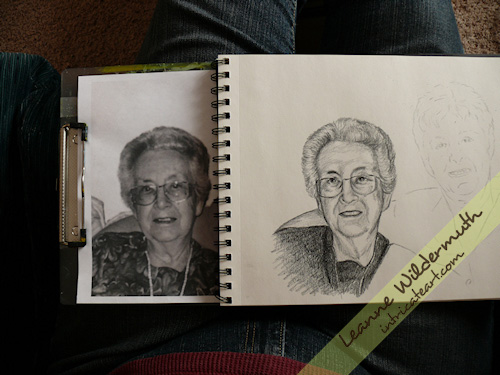
    Just like my previous portrait, I get the details down, shade in a medium value, and then return to blend, darken, and lighten or lift the pencil.

    Audrey is all sketched in, now I’ll bring in the blender (a tortillion) and lighten with either a kneaded eraser or for this portrait, I’ve used a pink pencil-top eraser as the areas are much smaller and require a fine edge eraser.

    Audrey’s portrait is blended now, though I’ll keep returning to it to make minor changes.

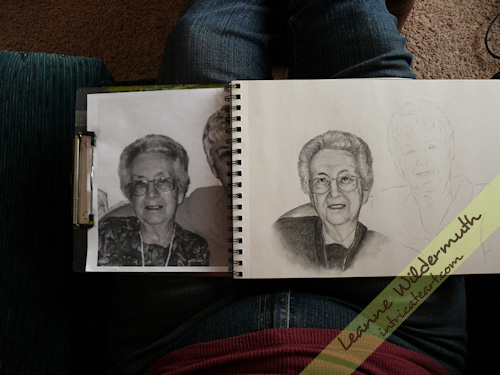
    Moving on, I’ve begun Janeice’s portion of the portrait, roughing in those medium values.

    Darkening in the hair, skin tones – her skin tone is really dark at this point so I lift a lot of that shading off with the kneaded eraser blend, and lift more.

    This is the latest photo, and at this point I’ve gone ahead and signed the portrait and I’m calling it complete, however I am still going back every half hour or so and re-evaluating, making more tweaks as needed. I’ll post the final scan in my portfolio.

    Jerry : Graphite Portrait Complete

    December
    4
    2008

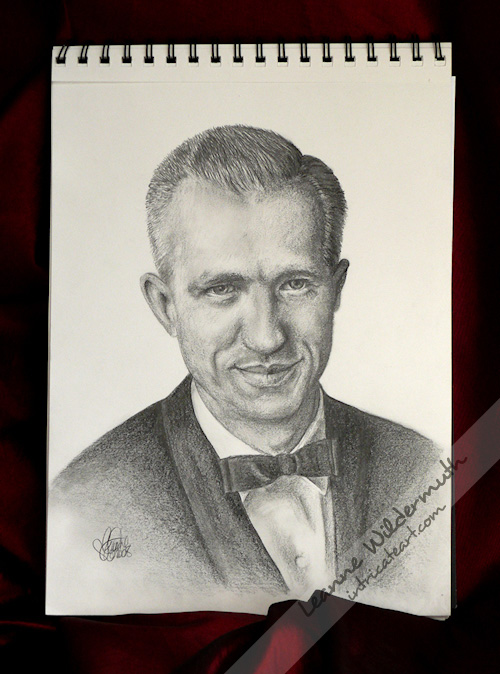
    Jerry, custom graphite pencil portrait drawing by Leanne Wildermuth

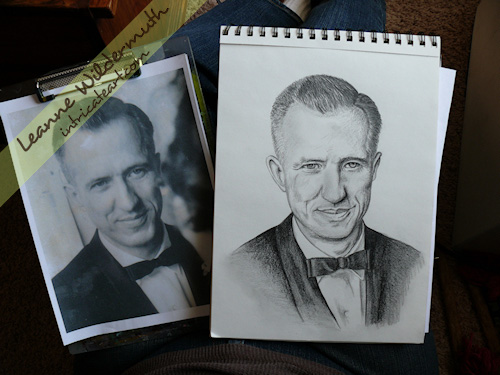
    I’ve completed Jerry’s portrait and received the proof approval from my client, so this piece is now officially complete!

    Much has changed since my last update, I’ve blended a medium tone over his whole face, then lightened and deepened further to get those final details. It’s turned into a very artistic yet lifelike rendering that I’m pleased to sign my name to!

    I’m still working on a few other projects as well, another drawing, an illustration – and two blog/site design clients to button up before Christmas. Can you believe how fast the days are going by?!

    Jerry : Graphite Portrait WIP 2, 3, 4

    December
    2
    2008

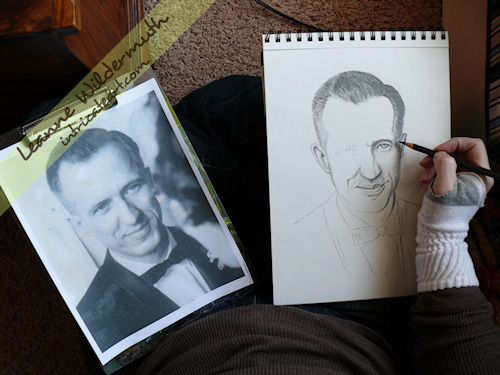
    I’m sharing a few stages of Jerry’s portrait with you today. Above, you can see I’ve already worked in his hair and have moved along to the left side of his face to work in the shadows. Initially, I’ll start with a medium value and work either lighter or darker depending on where I’m going in the portrait. I’m wearing a cut up sock (isn’t it cuuuuute) to keep the oils on my hands to myself and to prevent my wrist and hand from smearing the graphite.

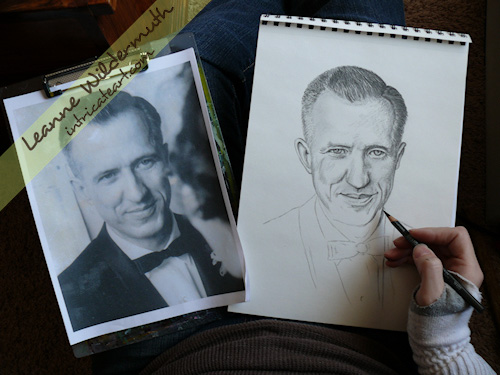
    Still working in facial features, darkening in the creases, browline, right eye.

    Here I’ve got the portrait pretty well drawn in. I’ll go back with my eraser pencil (yes, it’s a pencil with eraser instead of lead, one of my favorite pencils!!) and also darken and lighten further. I’ll use my blender pencil (if there’s a cool pencil to be found, I’ve probably got one) to really give that depth and dimension to the finished portrait.

    Overall, I’m very pleased with his portrait. It’s been a while since I’ve worked a two-legged creature (as June put it) and I rather enjoy the challenge!

    {Latest Projects}